The Parking Tower is the second subarea of Stellar Blade‘s Eidos 7, and it is home to many memorysticks, Naytiba entries, chests, and other collectibles. While players are likely to come across many of those items and entries without expending much effort, some of them are quite well hidden. For those fans that want to be certain that they do not miss any of those hidden offerings, this complete guide to Stellar Blade‘s Parking Tower collectibles is here to help.
Unlike some of the other subareas of Eidos 7, such as
Stellar Blade
‘s Silent Street
, all the collectibles in and around the Parking Tower can be claimed during the first visit to the area.
Stellar Blade: Every Trophy (& How to Unlock Them)
This Stellar Blade trophy guide will give you all the details to add that Platinum trophy to your collection.
Stellar Blade: All Parking Tower Collectible Locations (Visit 1)
1. Body Core
There is a body underneath the stairs that lead up into the Parking Tower, and it holds a Body Core.
2. Camp
With the Body Core collected, players should ascend the stairs to reach the Parking Tower’s first camp.
3 & 4. Abaddon Naytiba Entry & Weapon Core
Players will do battle with Stellar Blade‘s Abaddon on the Parking Tower’s rooftop, and they will receive this Naytiba’s entry when it is dispatched. The boss will also drop a Weapon Core that fans can use to enhance Blood Edge.
5. Camp

There is another camp on the roof where the Abaddon fight occurs.
6. Legionnaire 204’s Memory Memorystick
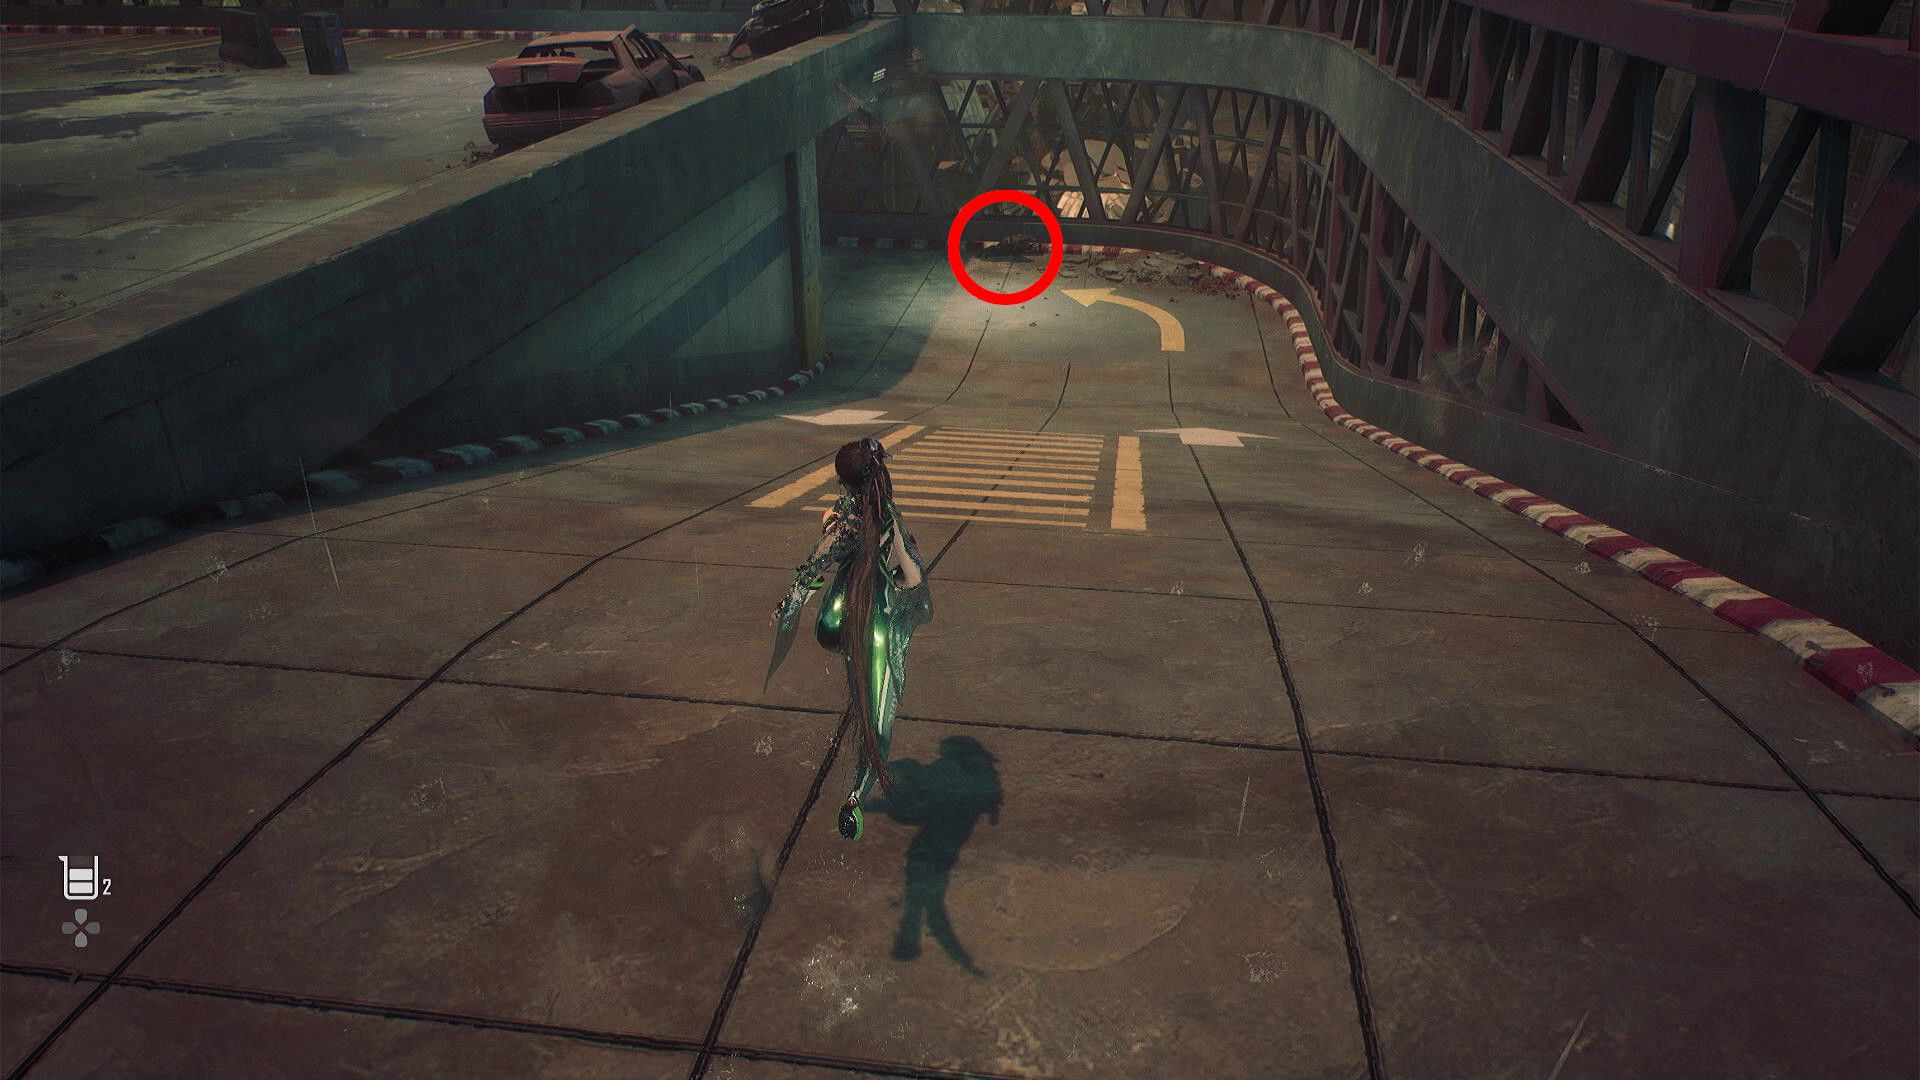
Players should now descend the ramp near the rooftop camp to access the parking structure’s third floor. There is a body that holds the Legionnaire 204’s Memory memorystick at the bottom of that ramp.
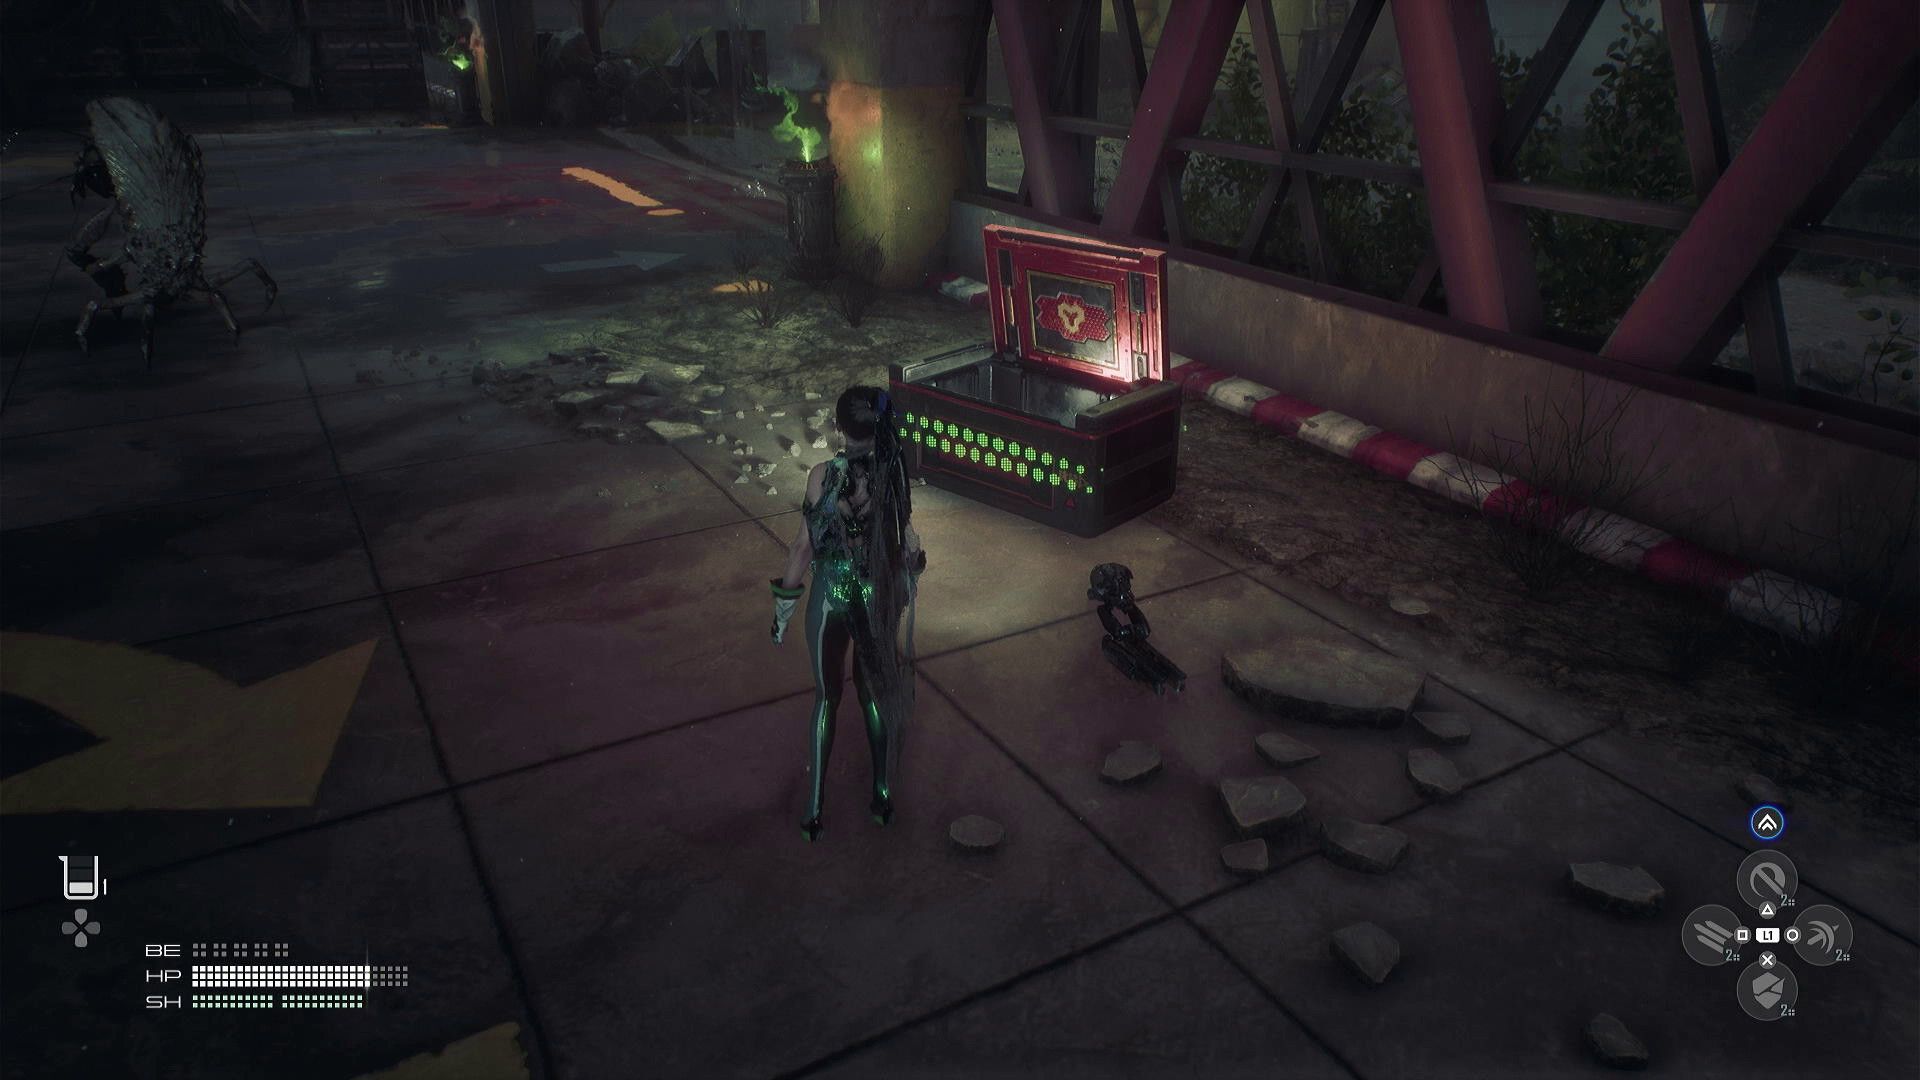
7. Chest
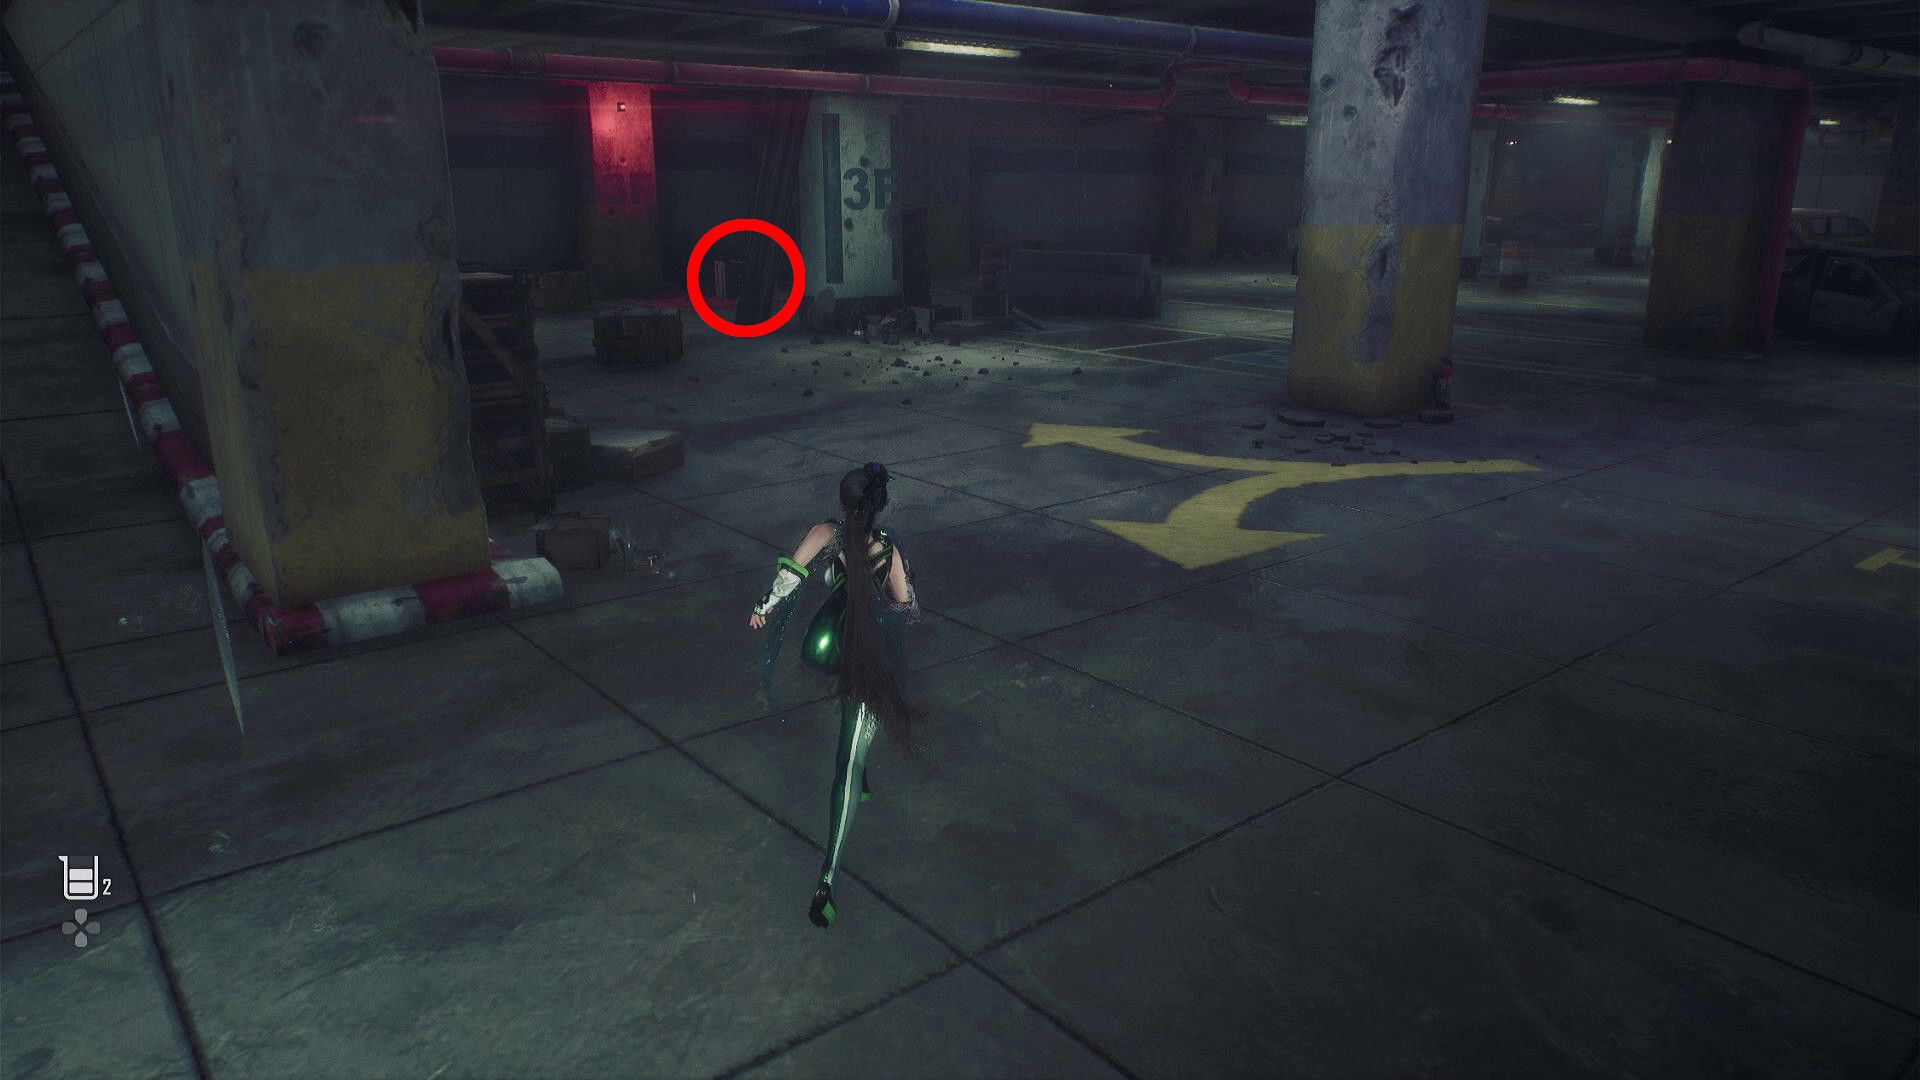
There is a chest in the back-left corner of the parking structure’s third floor, near the post that is marked “3F.”
8. Cricket Boomer Naytiba Entry

Players should now descend the ramp that leads to the structure’s second floor, and they will encounter their first Cricket Boomer at the bottom.
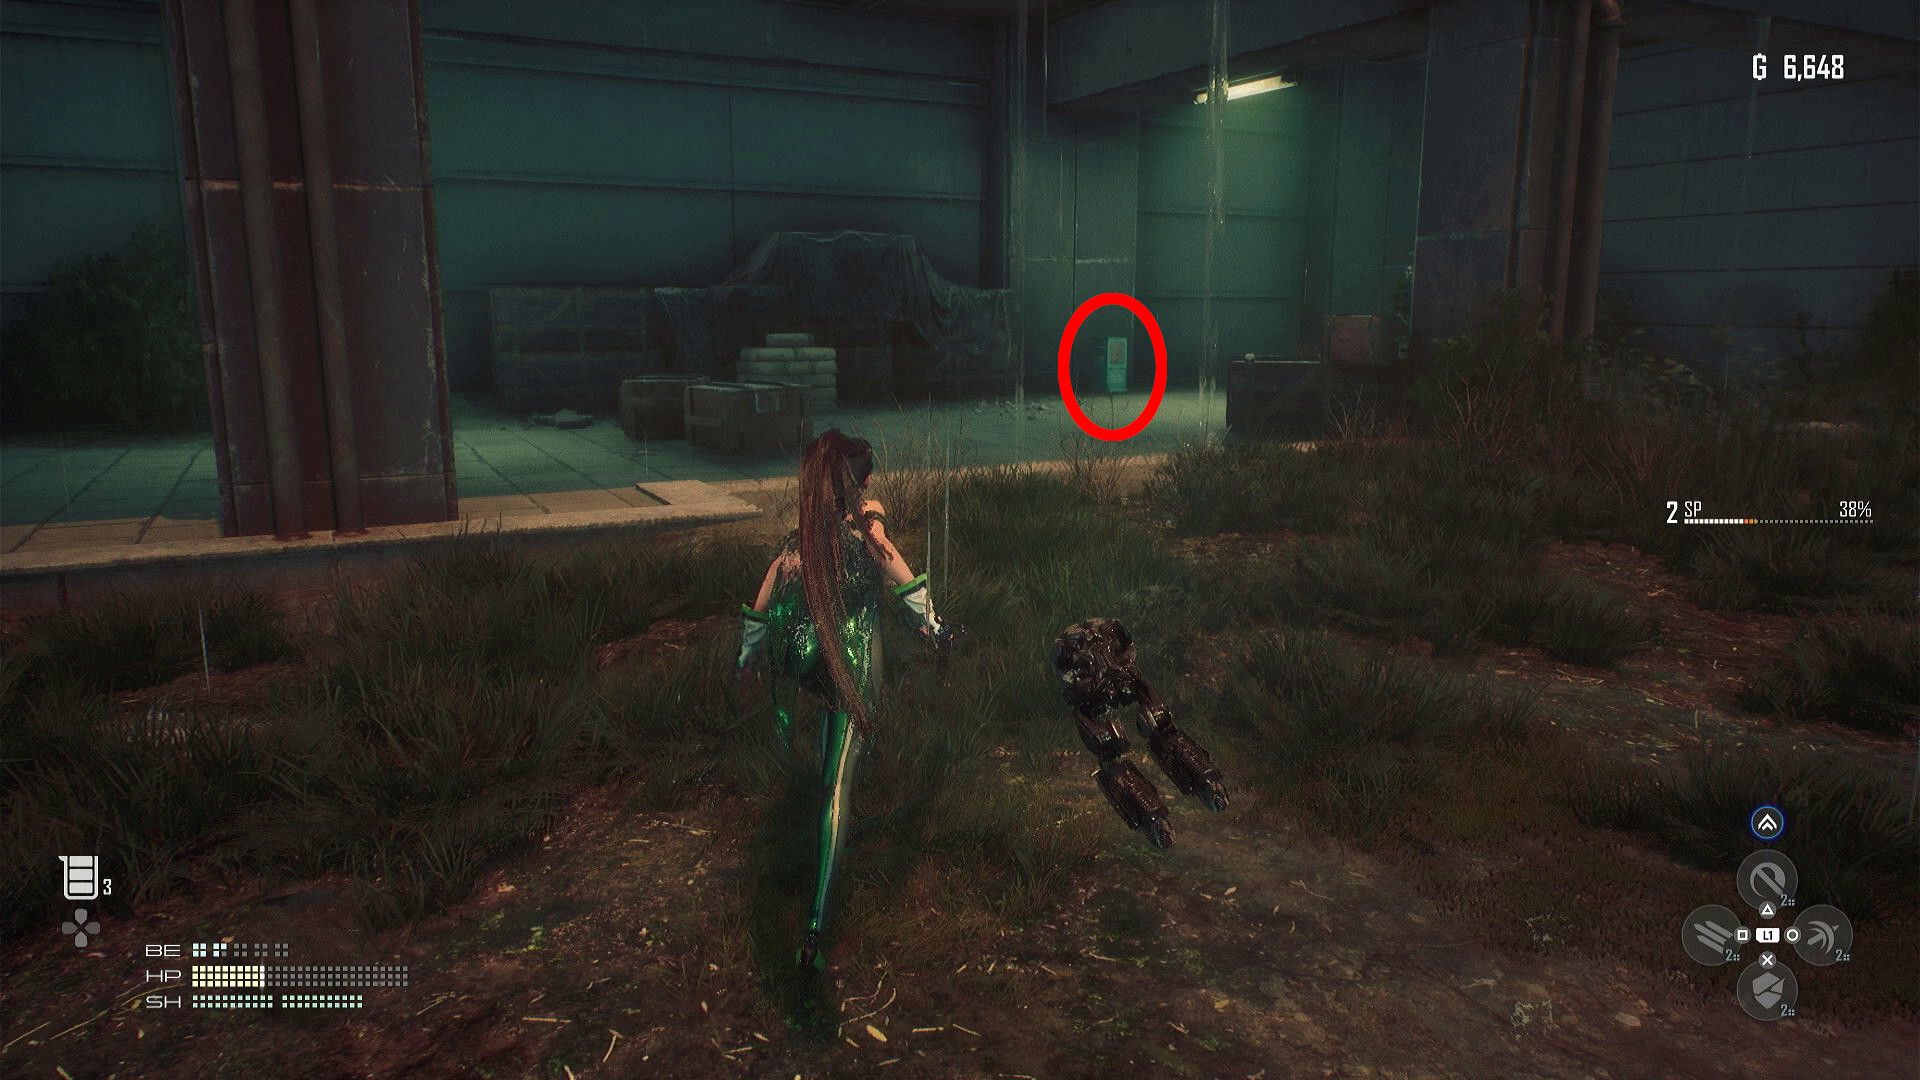
9. Chain-Type Exospine
The Chain-Type Exospine is in a small container that is situated in the far-left corner of the parking structure’s second floor.
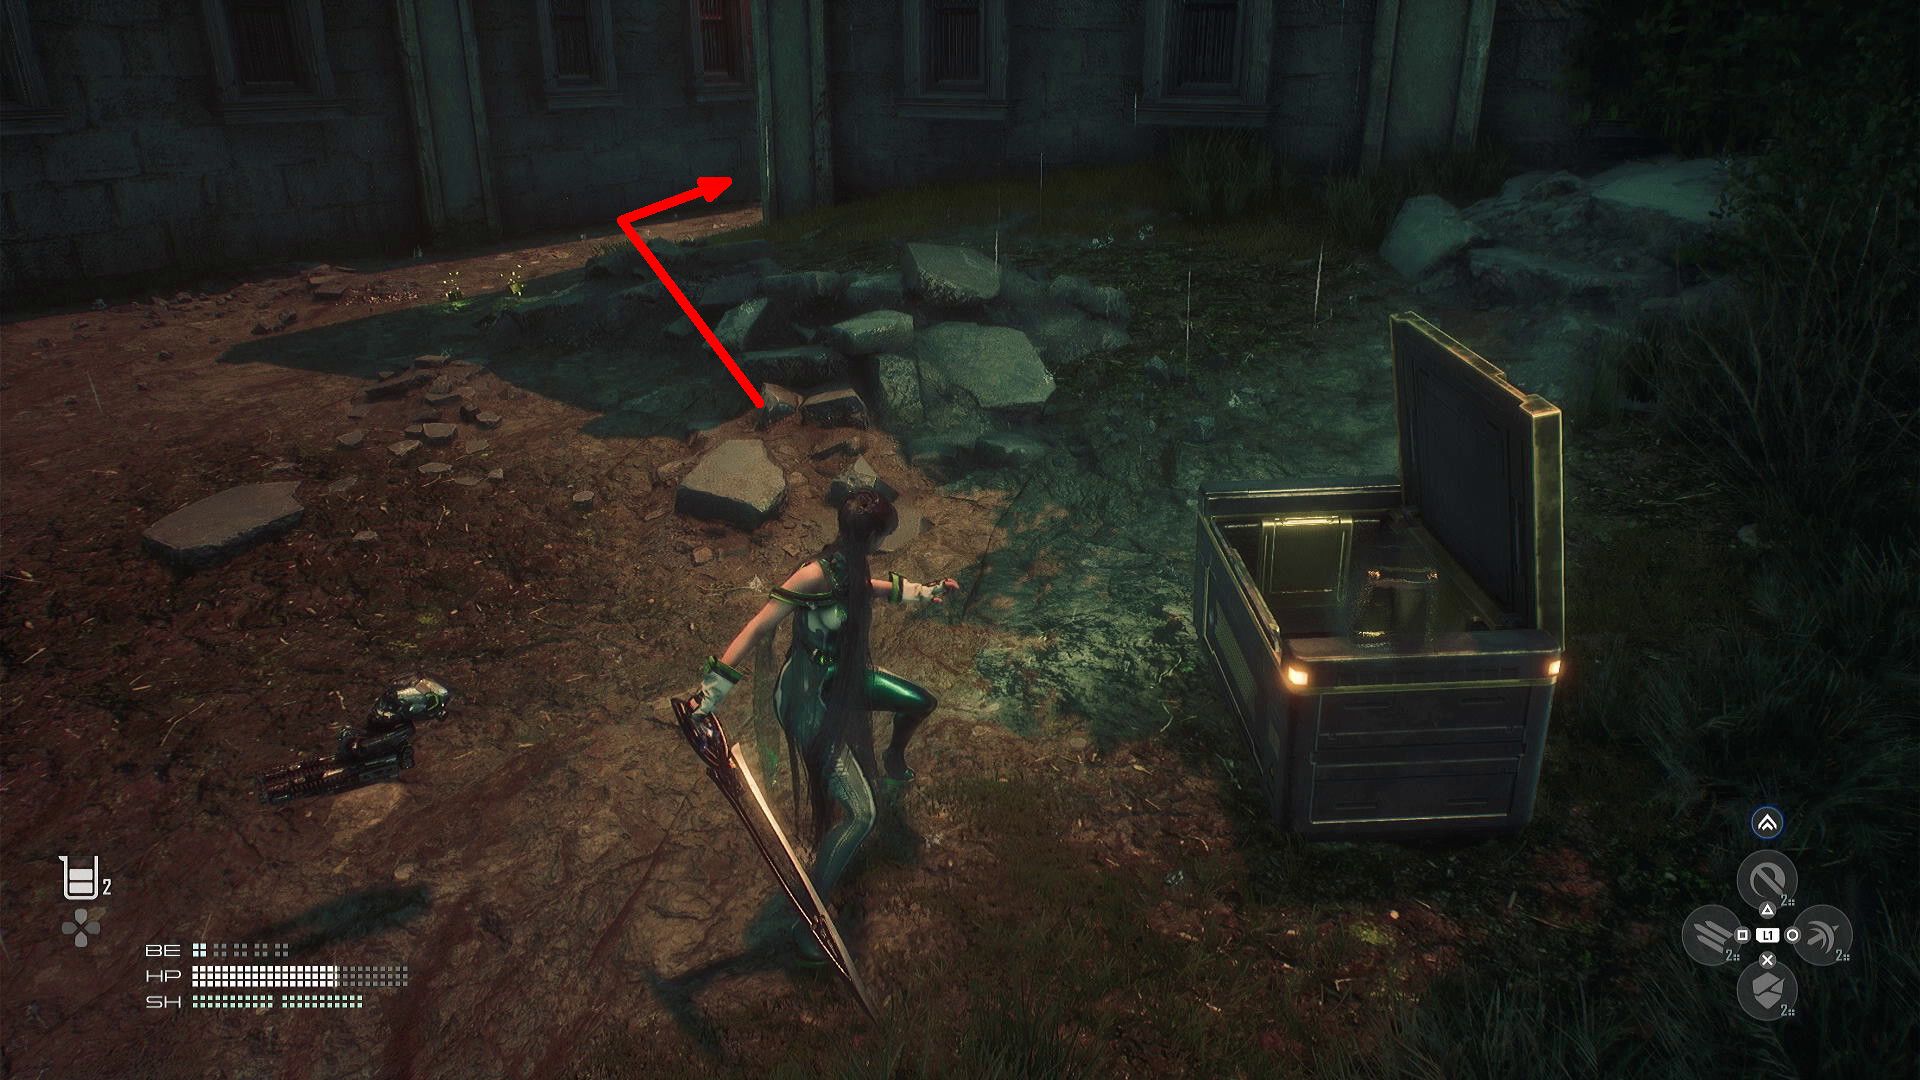
10. Chest
Players can now make their way down to the first floor of the parking structure. Here, fans of Action-adventure-games/”>Action-adventure video games will encounter three enemies, and defeating them all makes it possible to open the crate at the bottom of the ramp.
11. Camp
After using two Fusion Cores to exit the parking structure, players should cross the street to find a third Stellar Blade camp.
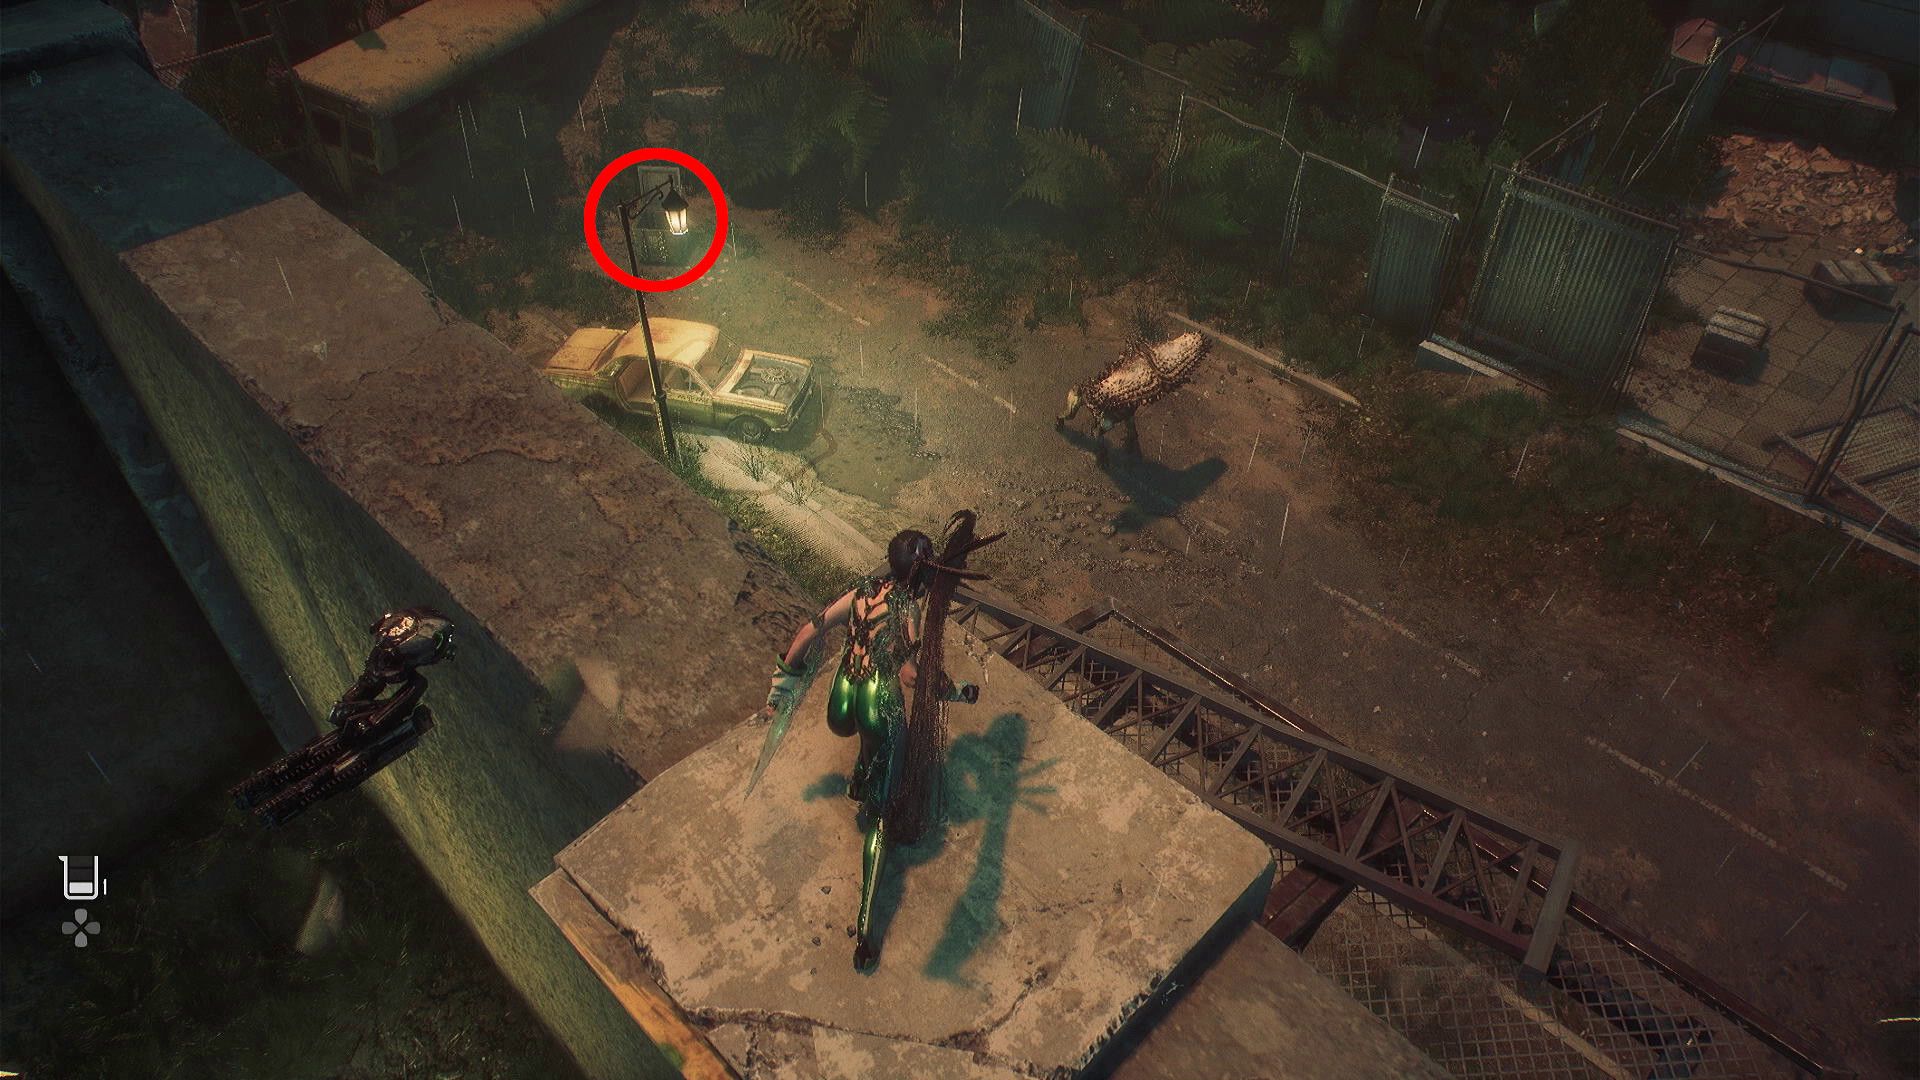
12. Memo Document
Players should now leave the third camp, turn right, and move forward until they encounter a large yellow crate. Fans must then complete two climbs in order to access an office, and they will find the Memo document on the wall in that room.
13. Chest
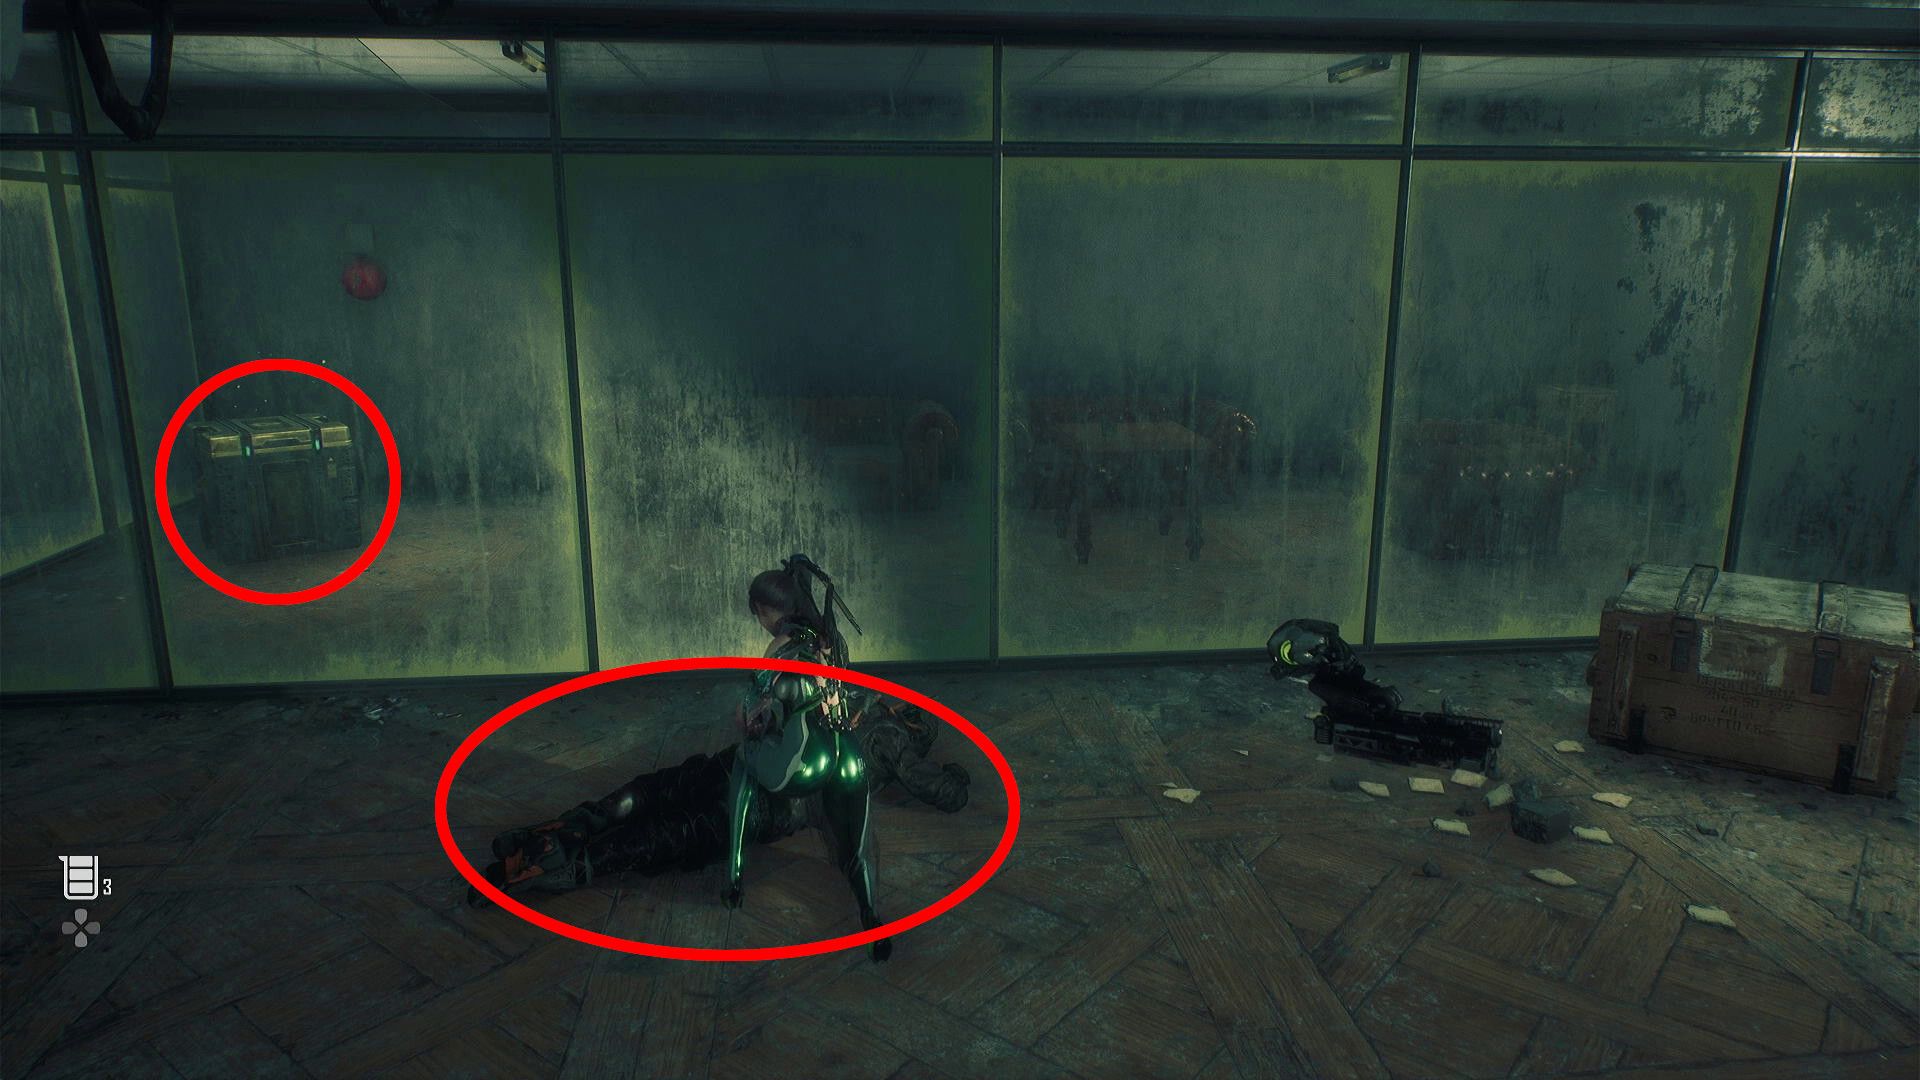
There is a body on the ground in the office, and investigating it will cause a Cricket Slasher to break through the nearby glass. This will make it possible for players to enter a small room with a chest.
14. Cannon Guardian Naytiba Entry
Players should now return to the ground and dispatch the roaming Cannon Guardian to secure its entry.
15. The TRUTH, Article 3 Document
There is a covered area next to where the Cannon Guardian is encountered, and there is a green newspaper rack within it. Interacting with that object awards the TRUTH, Article 3 document.
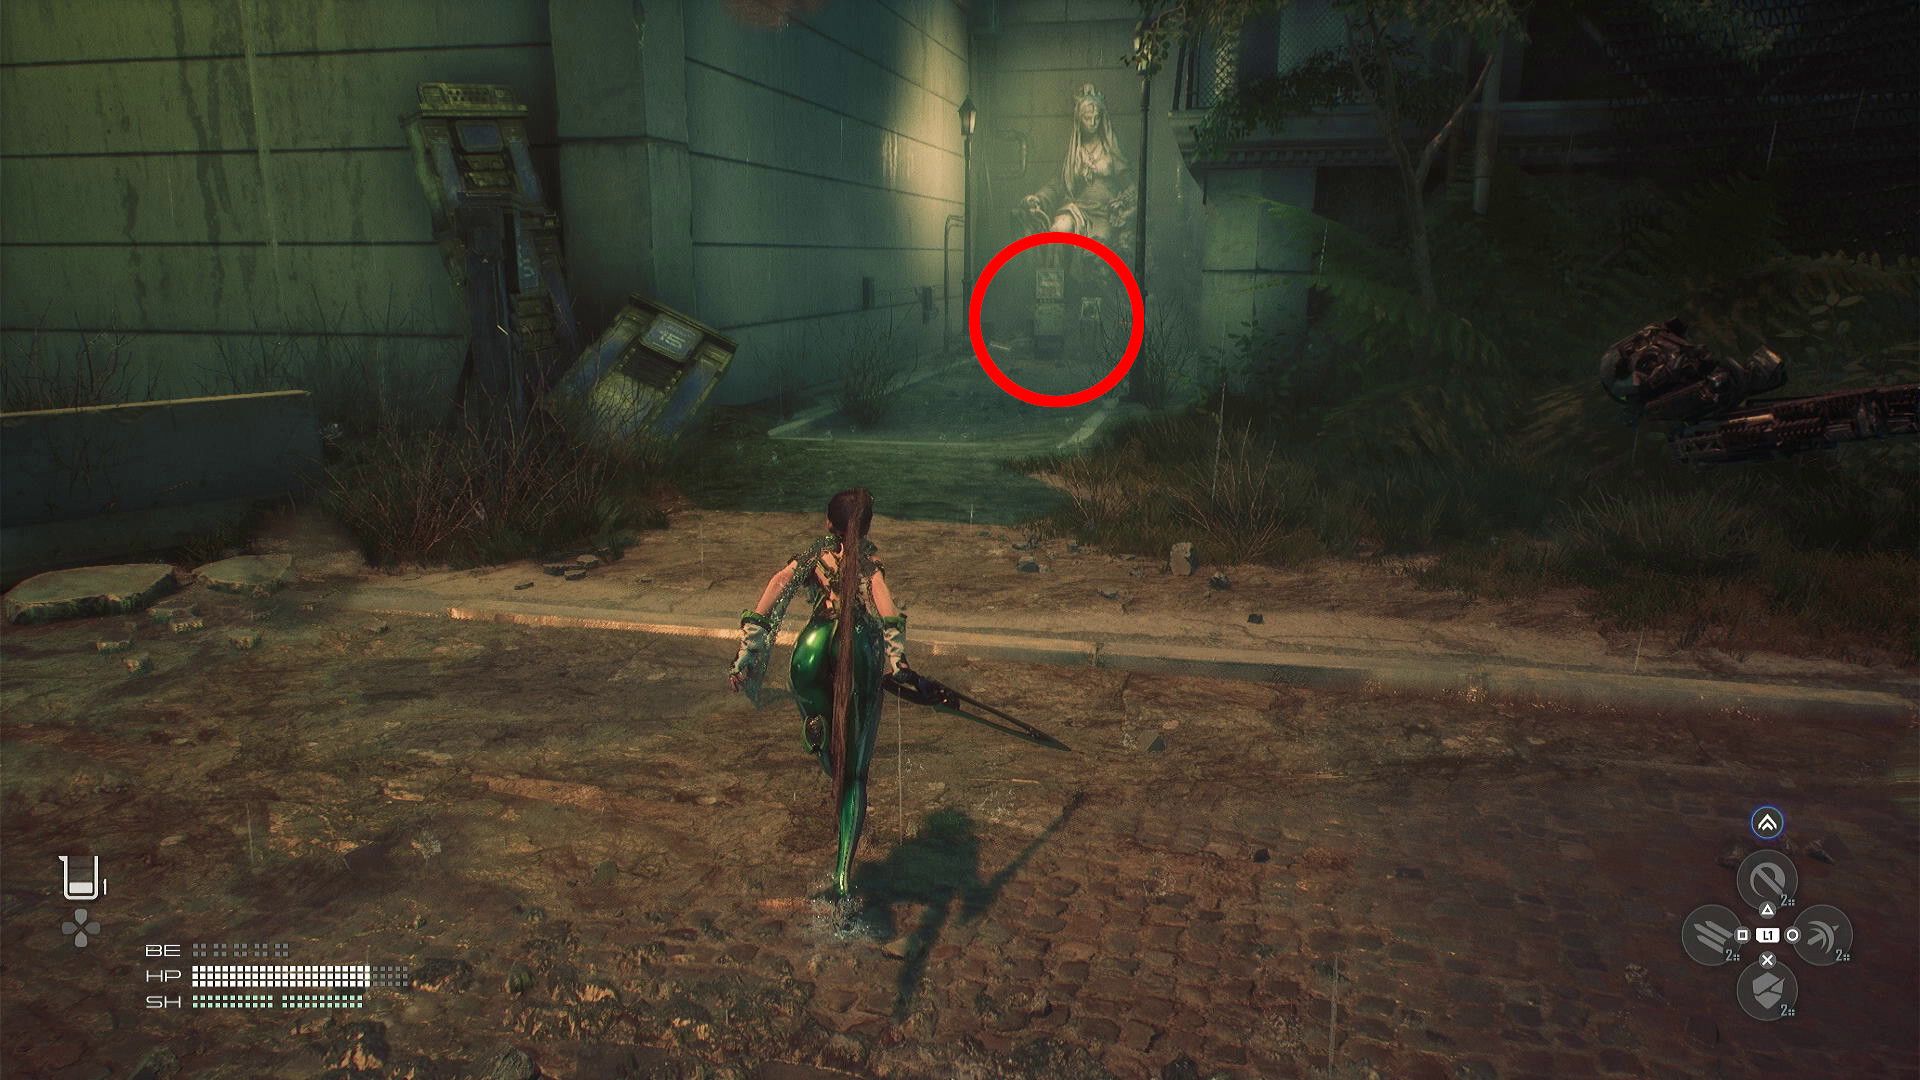
16. Outcry to the Sky Memorystick
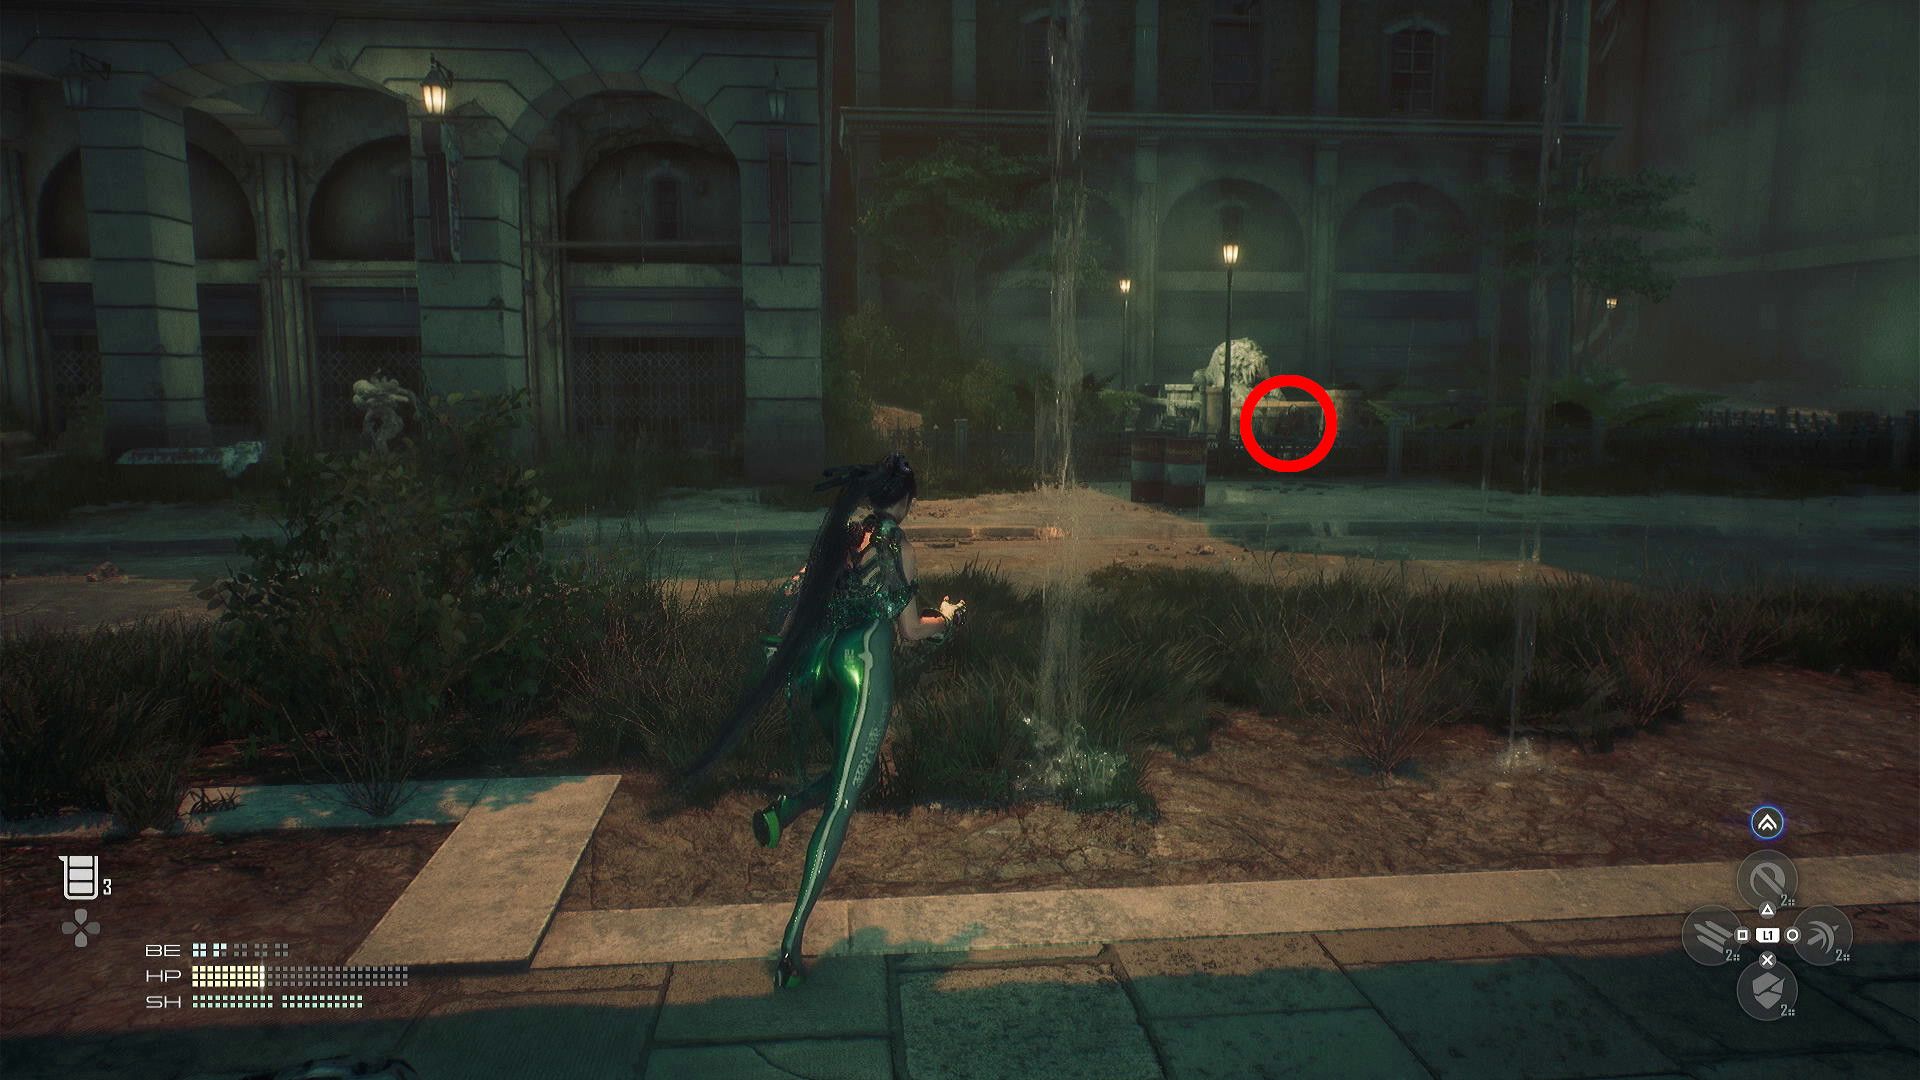
There is a body propped against a statue that is across the street from the aforementioned newspaper rack, and it holds the Outcry to the Sky memorystick.
17. Body Core
After collecting Outcry to the Sky, players should head to the right and descend the stairs on their left to go underground. Fans of games/”>PS5 exclusives should then climb the stairs that are directly across from the flight that they just descended and collect a Body Core from a body that is propped against a building with a “Cosnia Kolzen” sign.
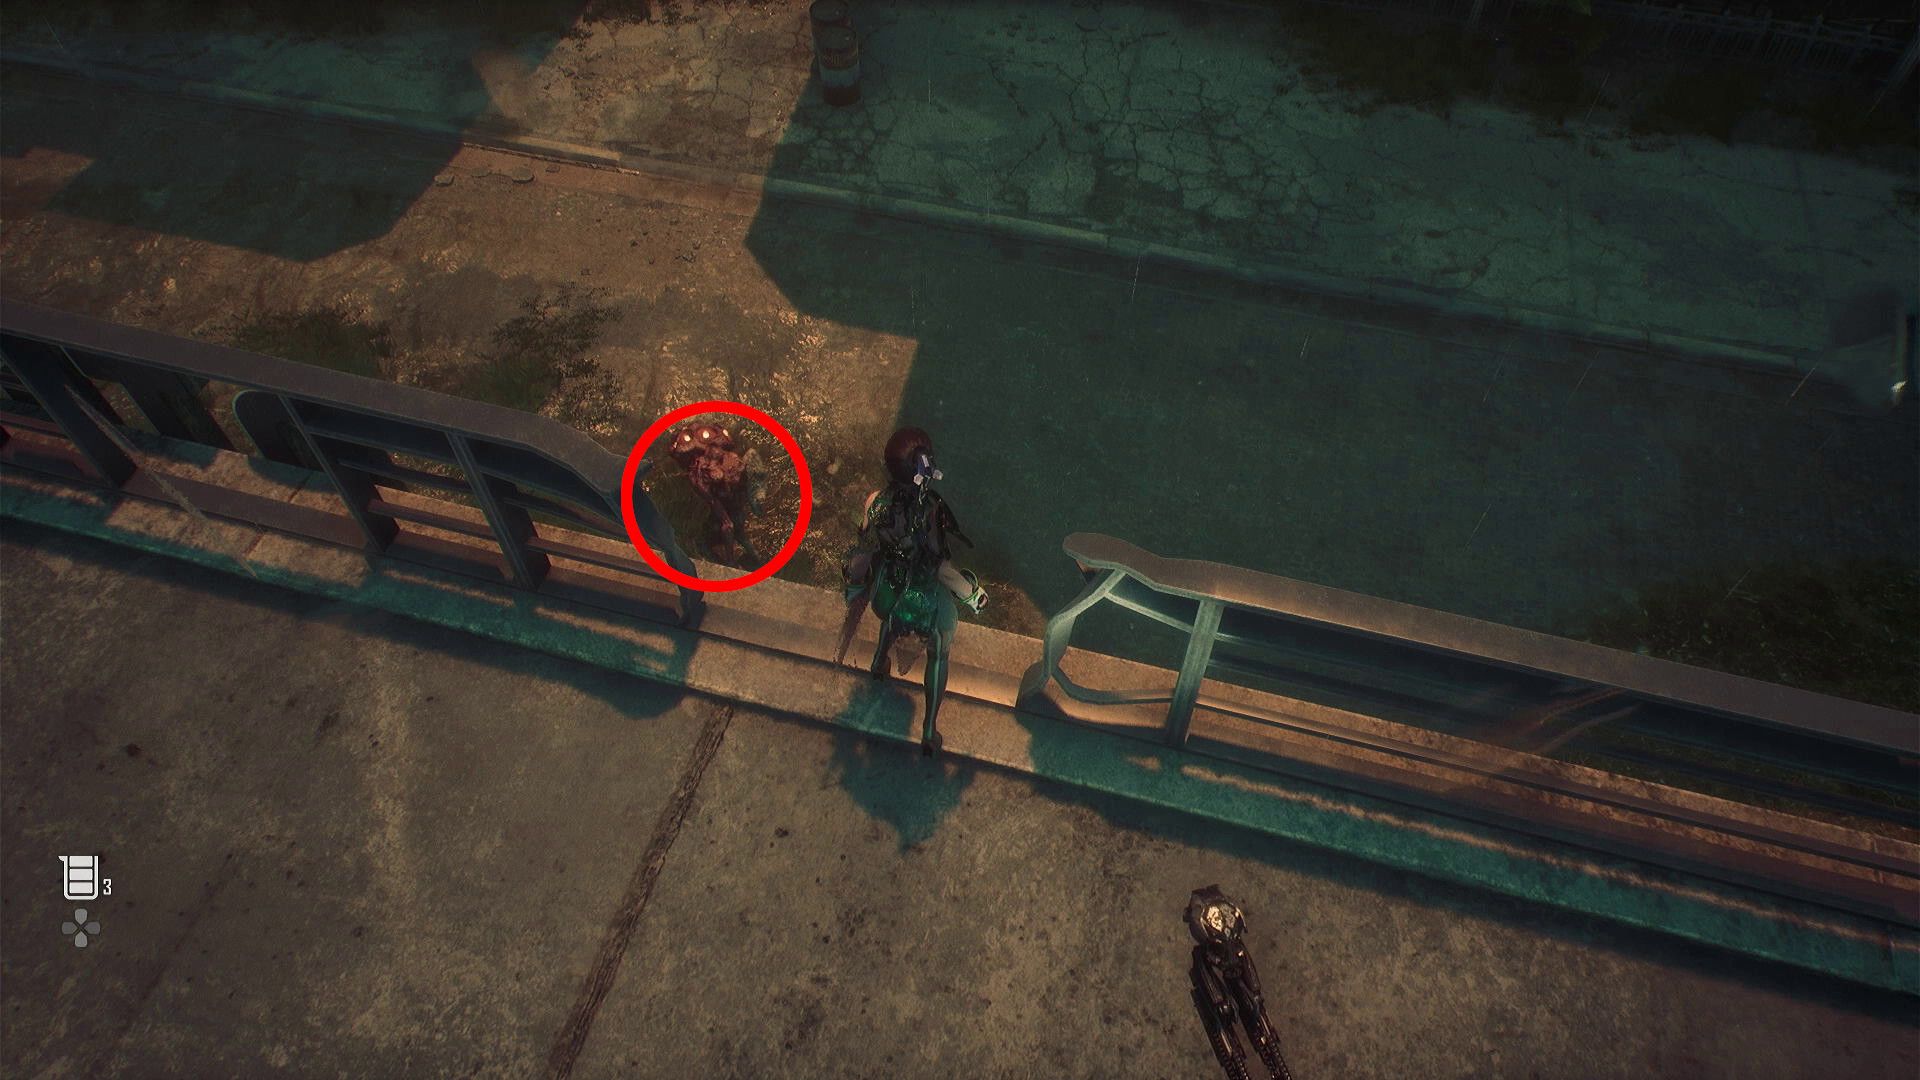
18. Dozer Naytiba Entry
Players should now return to the third camp and pass it to trigger an encounter with a Dozer.
19. Body Core
Once the Dozer has been dispatched, players should take the path to the right. After following that path around a U-turn, fans of games/”>sci-fi video games should look for a small bar on the left, and the body that is inside awards a Body Core.
20. Breach Chest
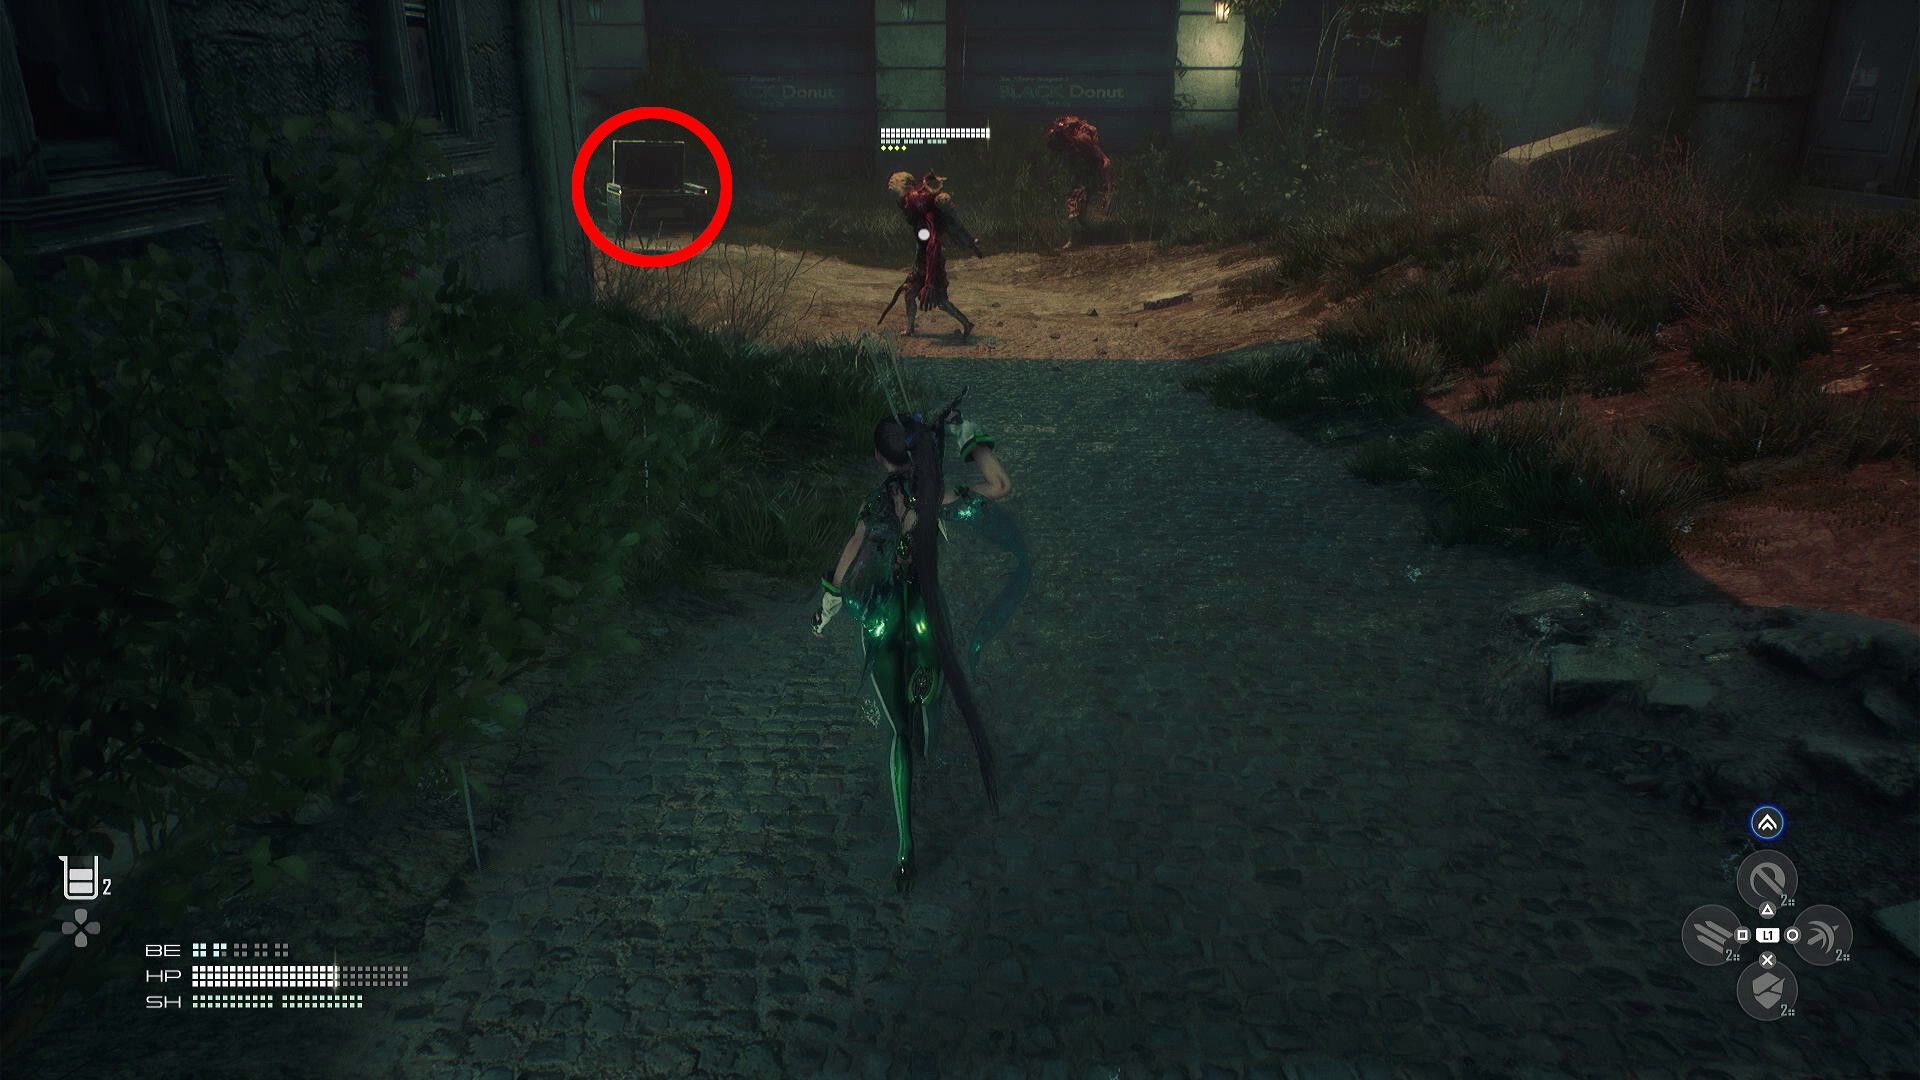
Players should now exit the bar and continue down the road to reach a crate that is opened via breach. To perform that technique, fans must simply press directions on the d-pad in the order that is indicated on the lock before time runs out.
21. Drone Upgrade Module
There is a small enemy just left of the breach chest, and it awards a Drone Upgrade Module when slain.
22. Legionnaire 302’s Sorrow Memorystick
Players should backtrack and continue straight past where they fought the Dozer. Fans that travel in that direction for a short distance will see a graffitied wall on their left, and they should use the nearby yellow crate, and a series of handholds, to climb. Players should then hit the ground on the other side of the wall and collect the Legionnaire 302’s Sorrow memorystick from a body in the corner.
23. Chest
Players should now climb back over the wall, dispatch the nearby Dozer, and open the chest near the dilapidated bus.
24. Request to Mother Sphere Memorystick
Once the chest has been addressed, players should turn around and enter the covered area on their left. There is a body that awards Request to Mother Sphere leaning against the wall in that area.
25. Chest
There is a red garbage bin to the left of the body with the memorystick, and players can use it to reach a series of handholds that lead to a platform with a chest.
Stellar Blade
- Released
- April 26, 2024
- Developer(s)
- Shift Up
- Publisher(s)
- Sony Interactive Entertainment
#Stellar #Blade #Parking #Tower #Collectible #Locations #Chests #Naytiba #Entries #Memorysticks #Documents #Passcodes


More Stories
15 Best Co-Op RTS Games, Ranked
Amazon Prime Announces The Tomb Raider TV Show
Marvel: 19 Strongest Hulks In The Comics, Ranked