It’s easy to have a kind of stork-myth response to this question: Chassis simply come from somewhere else. They’re born on high-tech assembly lines heavily staffed with robots performing strange, pneumatic choreography. They’re delivered into your life via dealer lots and junkyards. You can modify them, you can swap them, but they aren’t something that springs forth from your own garage–right?
In reality, many DIYers are capable of transforming a pile of tubes into a chassis. We’re proving it by creating our own Lotus Seven clone.
In the first two installments of this series, we showed how to attack a fabrication project and start stitching it together. Now we’ll share some tips for making sound welds–you know, the glue that keeps it all intact.
Before we go any further, we need to set the stage for successful welding. Too often we see people fighting the welding and ultimately their project as they build. Burn-through, bubblegum welds, and changing dimensions can all be avoided. With the right methods, even a novice welder can produce results that look like they’ve come out of a pro shop.
Cleanliness and Fit
The welding is only as good as the prep, and two foundations of good welding are cleanliness and proper parts fit. It’s a pretty simple concept: Since you can only weld metal to metal, it’s important to make sure that nothing is getting in the way of your weld. The two most common impediments are dirt and air. You can’t weld dirt and you can’t weld air, so don’t try.
Dirt, of course, is a generalization that includes all the contaminants that affect good welds. Dust, oil, paint or other foreign materials on the parts will greatly degrade the quality of the welds. We always clean our parts with a wire brush followed by a good solvent. We make sure our welding rod or wire is clean, our welder is clean, our workspace is clean, and our gloves are clean. While this may sound like a manifestation of OCD, it’s an obsession worth having: Cleaning is easy, inexpensive and effective.
What do we mean when we say you can’t weld air? The bottom line here is that parts need to fit well to be welded well. The goal of a weld is to evenly heat both sides of the joint and melt in the filler material. If both sides fit well together, even heat transfer will result in a nice weld.
If they don’t, it’s very easy to apply too much heat on one side and not enough on the other. The results then will range from uneven quality and bubblegum welds to holes blown through one side when it can’t handle the additional heat intended for he other side. Ensuring a tight fit is as important and worth the effort as ensuring cleanliness.
Plan and Adapt
It’s important to understand that a part will move as the welding progresses. It’s a metallurgical fact that if you heat up metal and let it cool, it will shrink in the heat-affected zone. That’s why parts warp when they’re welded: It’s shrinkage, and more heat will cause even more shrinkage. Properly planning for that movement and reacting will make the difference between satisfaction and frustration.
A mistake many fabricators make is to heavily and firmly clamp parts into position and then make their welds in a random order. If they’re lucky, they’ll remove their clamps and the part will sort of be in the right shape. The more likely result is a “boink” as the newly unclamped part gives way to the stresses in the weld joints.
While we do clamp parts into position, we try very hard to have those parts naturally stay in the correct position once the clamps are released. We do that by carefully planning the size and order of our welds, allowing each weld to compliment or compensate for its surrounding welds.
As you put this into practice, make sure your early welds are small welds. Never put down a finish weld without first doing a series of tack welds. Try to match the tack welds in size, and do them in an order that balances out the movements they cause.
If you’re welding the base of a square tube, for example, lay a small tack in one corner. That one tack will often cause visible movement at the other end of the tube. Compensate for that movement by putting the next tack weld diagonally opposed to the first. If you’re careful to match the size of the tack to the first one, you’ll usually see the part move right back into position.
Proceed with two more compensating tacks on the remaining corners. If you instead weld consecutive corners, the first two tack welds will likely pull the tube so far out of position that the next two couldn’t overcome the damage.
Okay, time to do some welding.
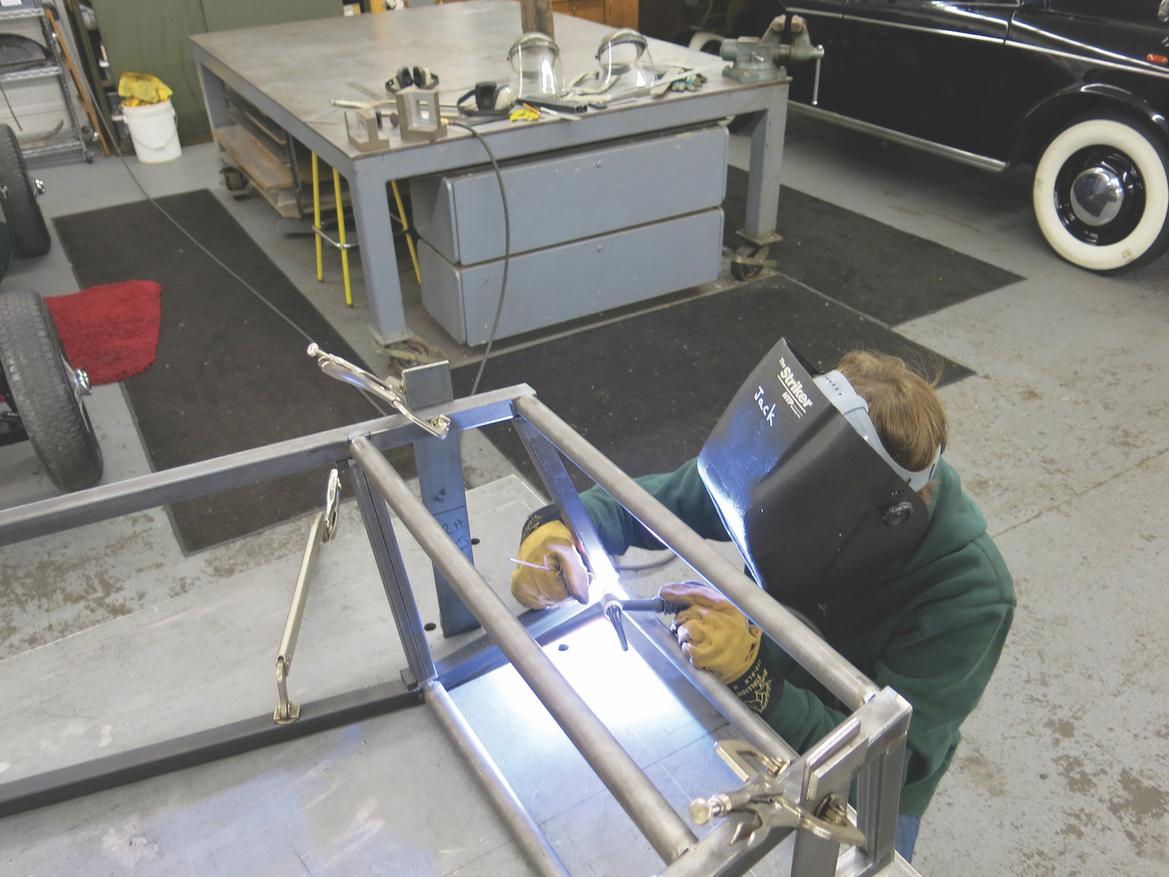
1. In addition to planning, cutting and fixing, following some simple welding basics will allow your homebuilt chassis to become a reality.
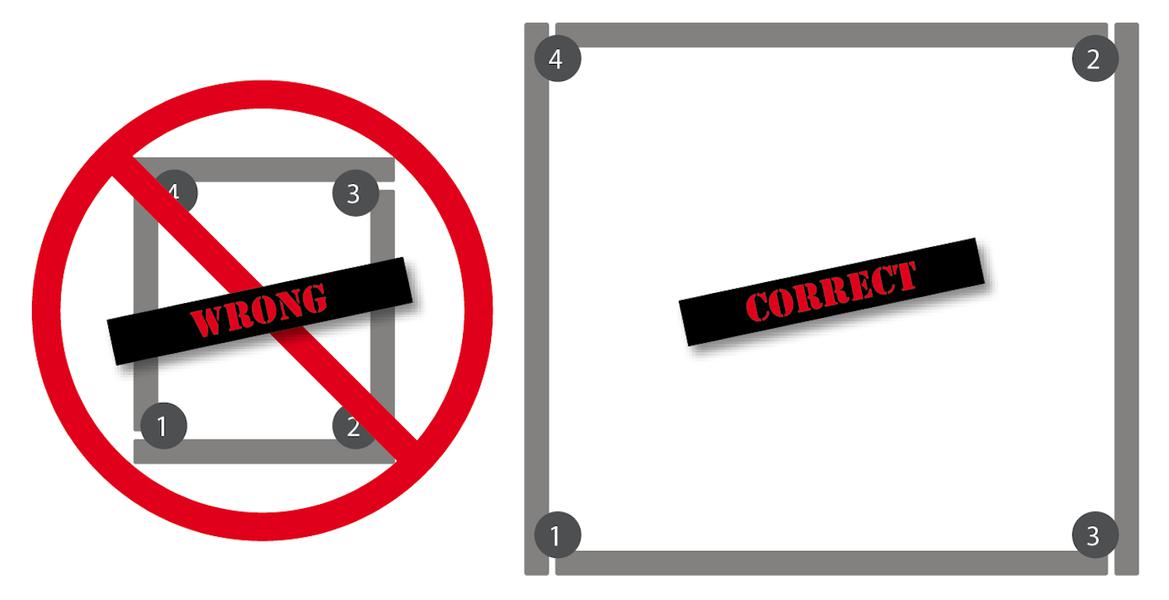
2. When joining square tubes, use a crisscross pattern for your tack welds. If you weld the corners in order, odds are strong that things will not line up afterward.
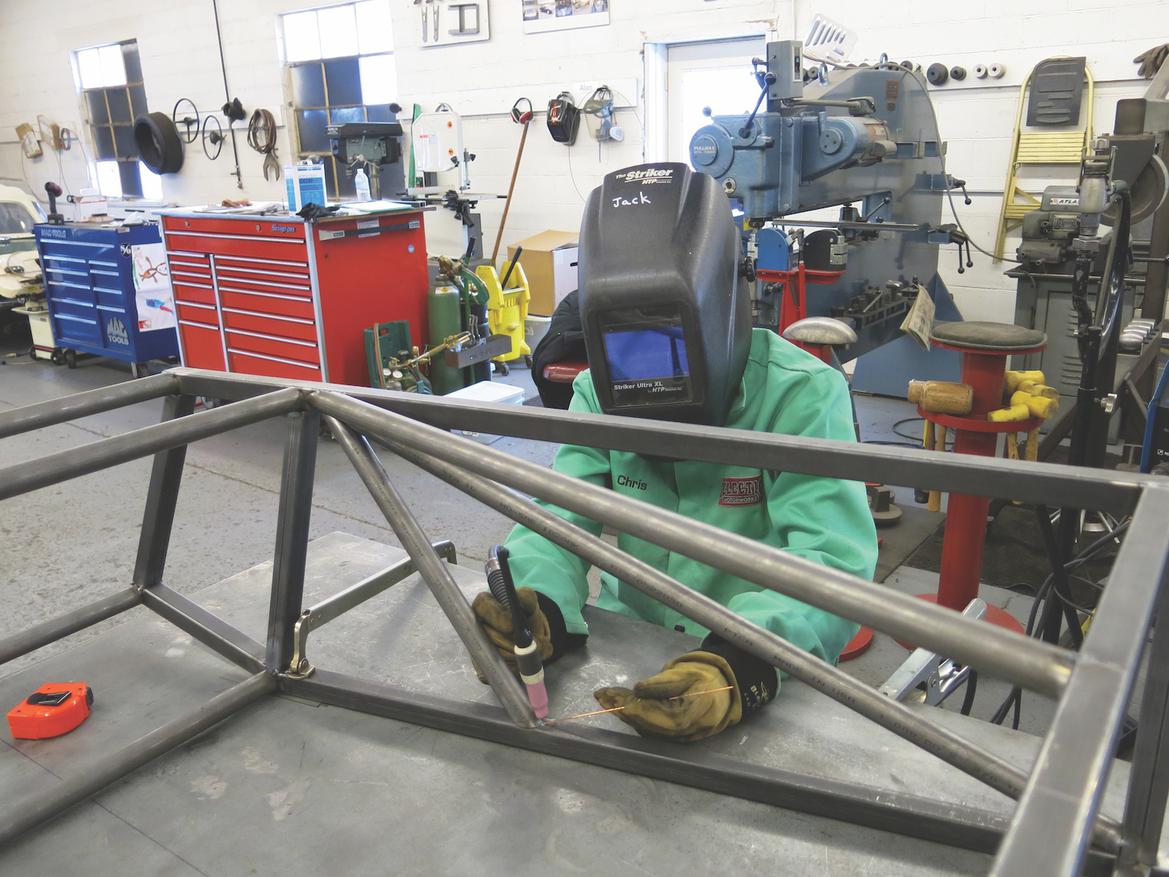
3. While we used a TIG machine for this project, all forms of welding–including MIG–follow the same basics. Our welder is 16 years old, by the way, and this is his first foray into TIG welding.
He’s getting good results on his first try because he’s using the methods described in this story. You’ll get similar results, no matter what your experience level or weld process.
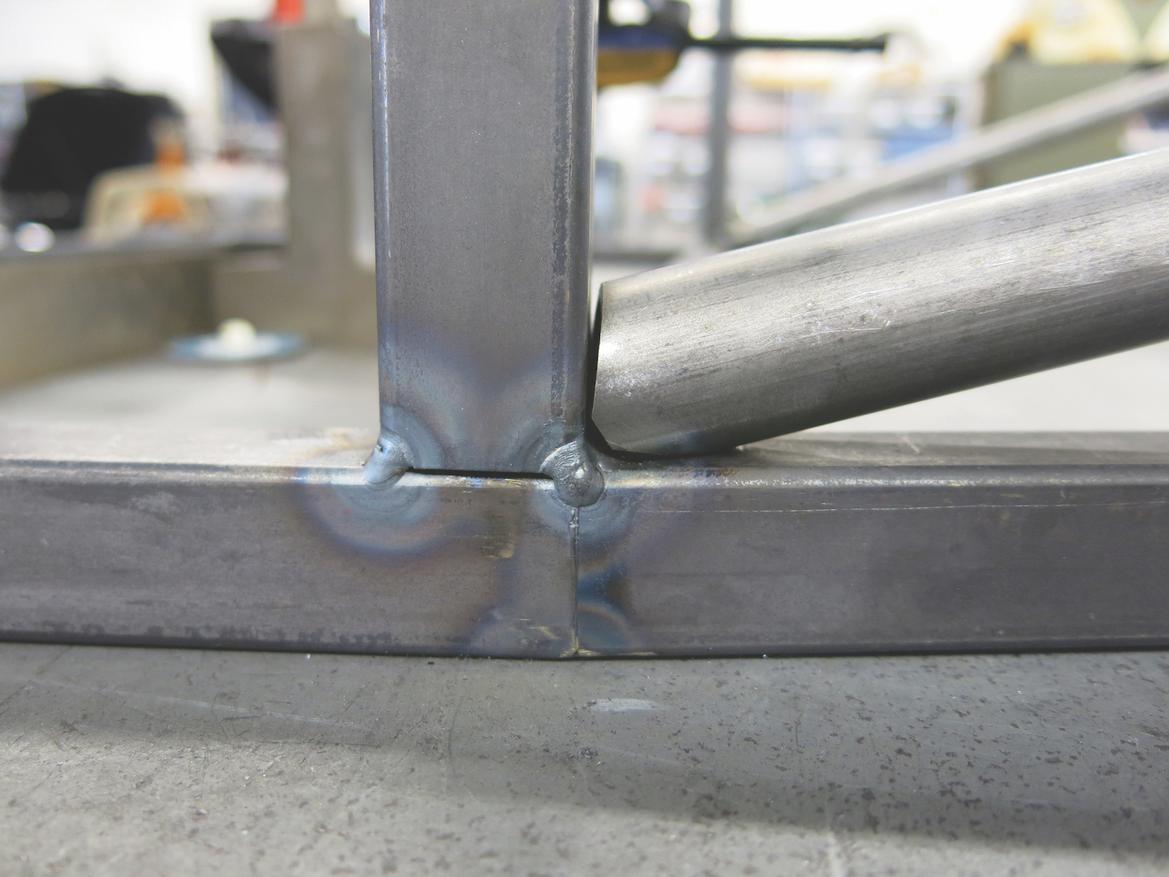
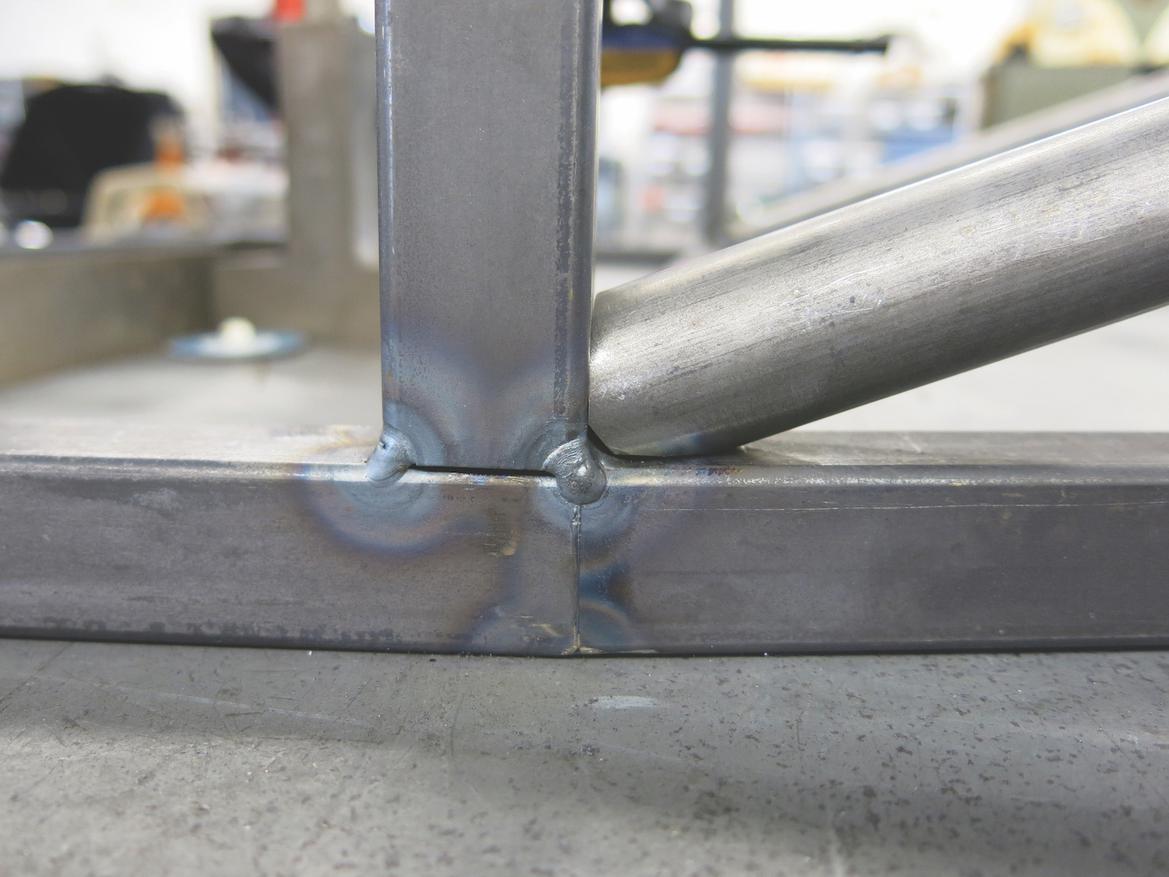
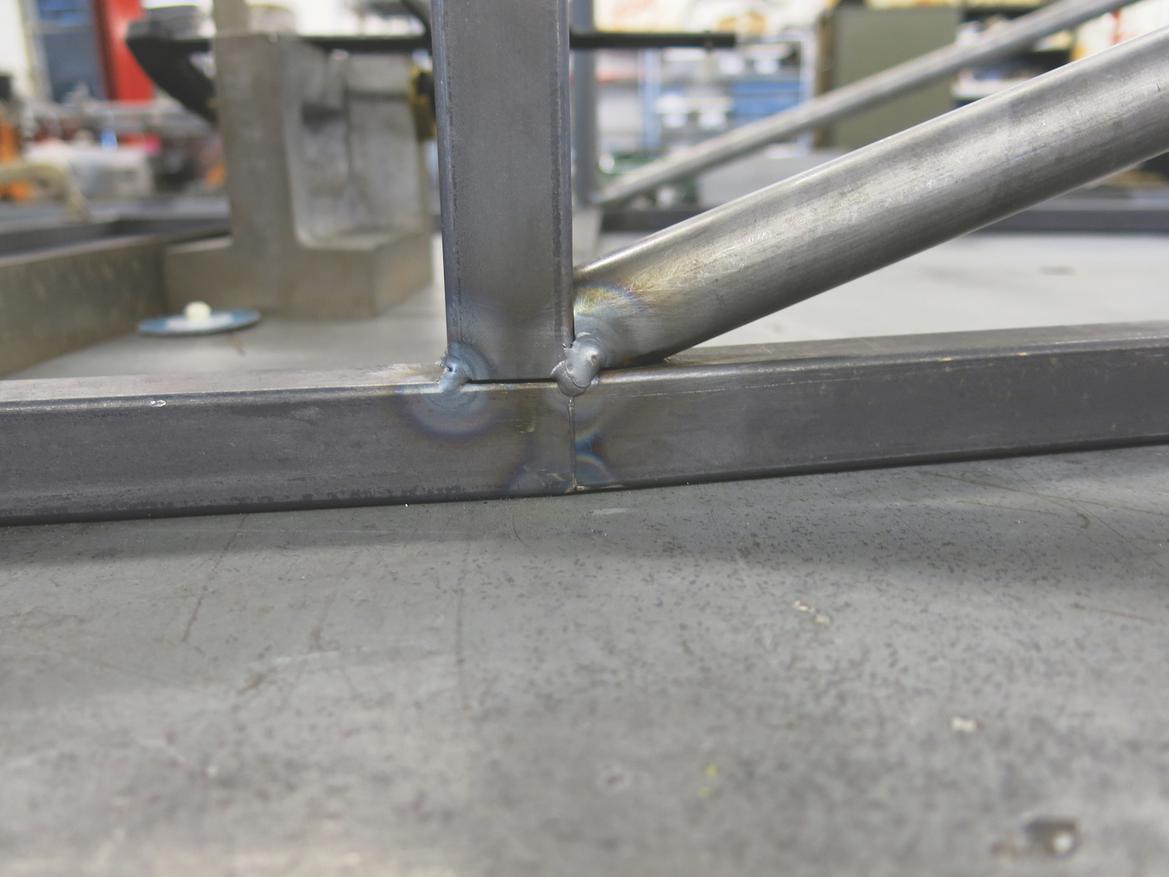
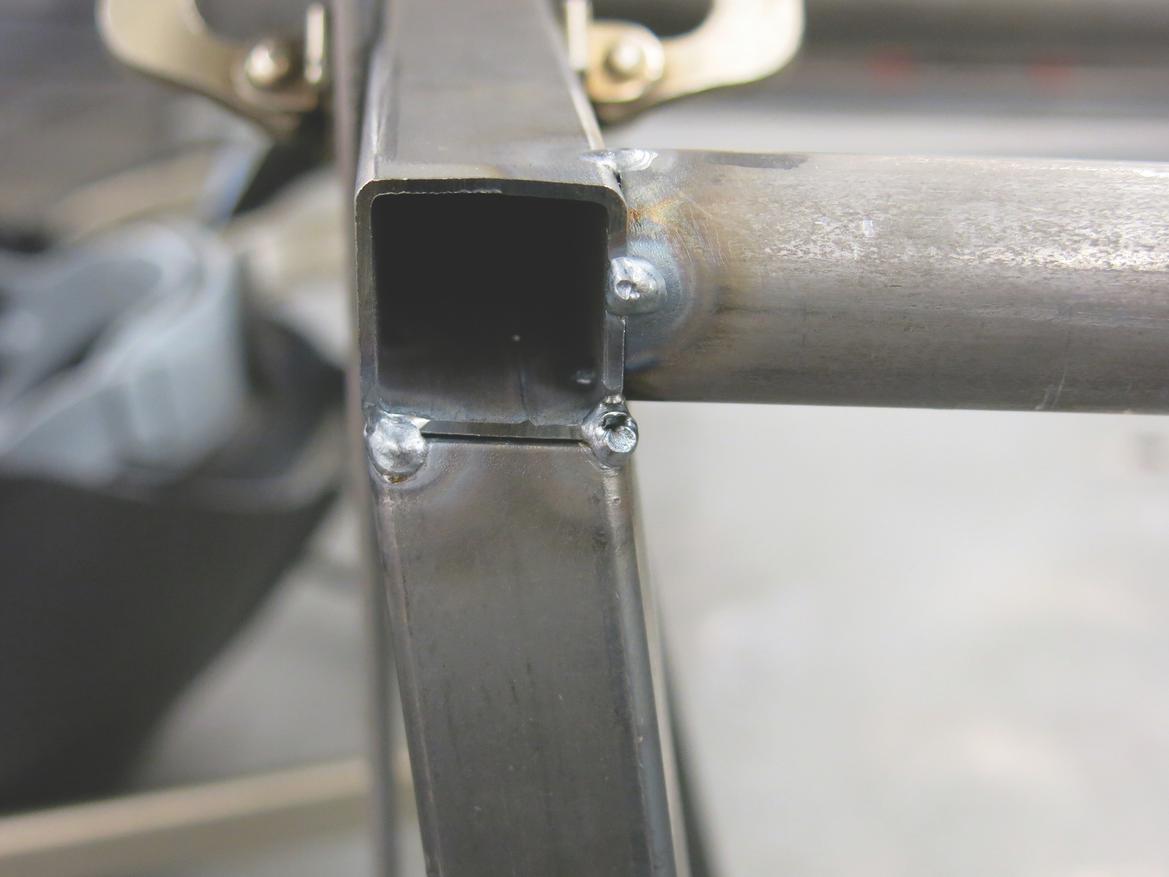
4. The picture on top shows a poor fit, while the one on the bottom is good. Too often a lazy welder will feel it’s okay to fill a big gap with a weld. While that’s certainly possible, it’s risky–bubblegum and holes are likely.
A good fit is a better approach. Note that a bit of notch was required in the corner to make room for the previous weld in the joint. Sometimes minor compromises like this are necessary.
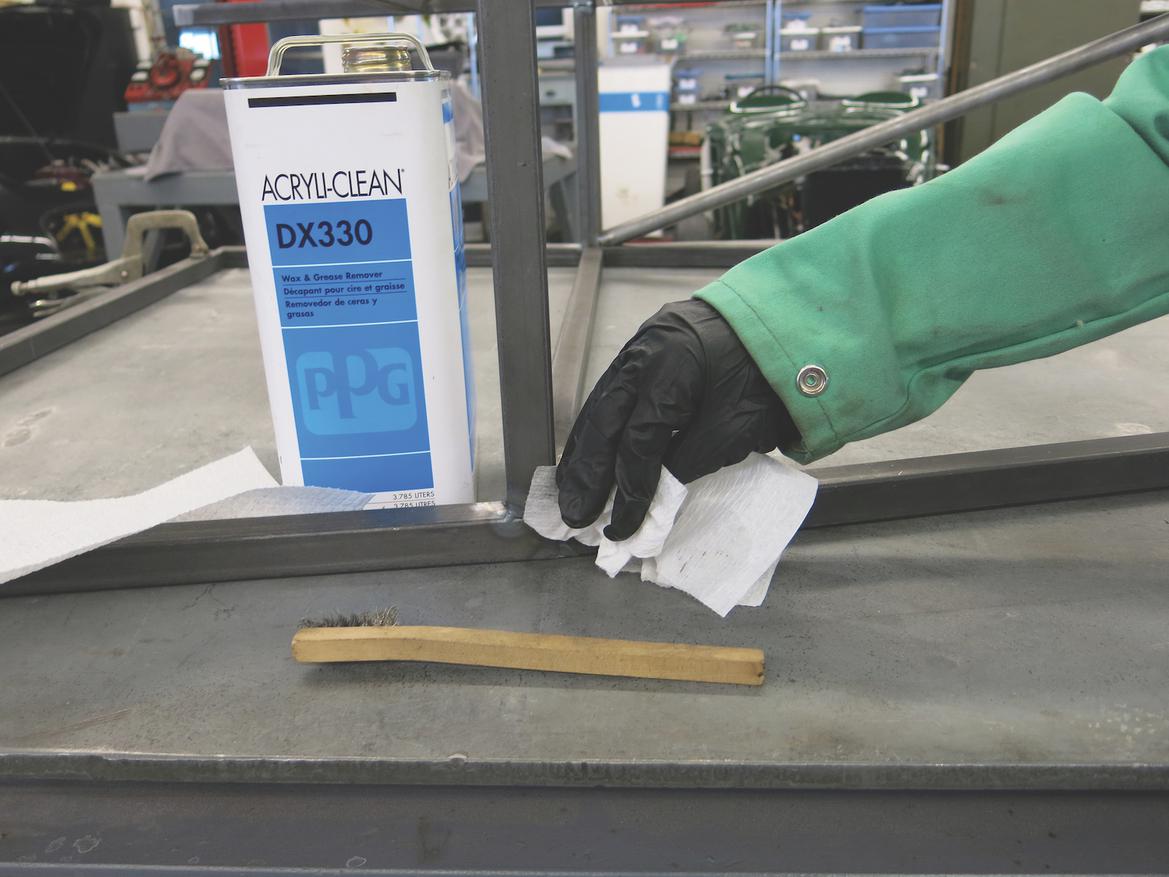
5. Before laying your first tack, make sure the joint is clean. Wire-brush the parts, wipe them down with a solvent-soaked paper towel, and then dry the joint completely with another clean paper towel. Repeat this process until no dirt shows up on the white paper towels.
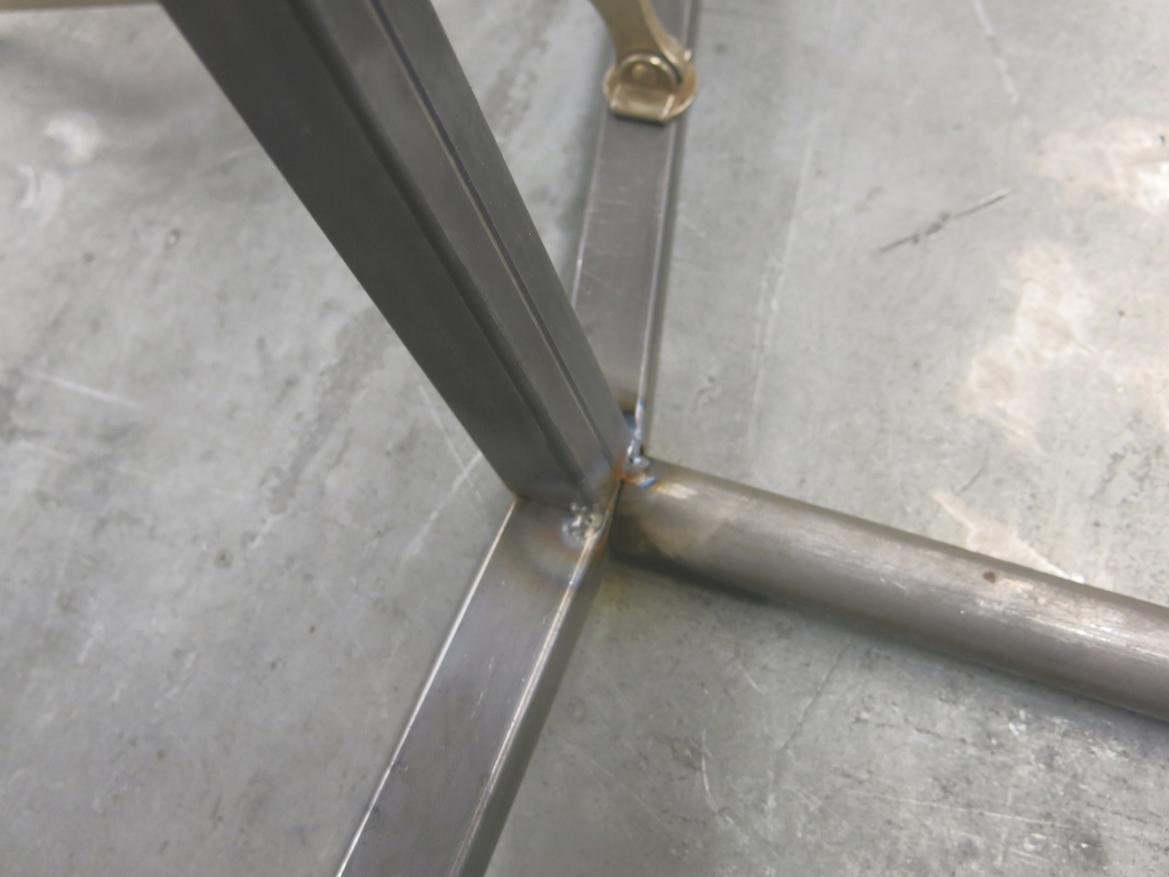
6. Put a tack weld in the corner of the joint, then add a complementary weld diagonally on the opposite side.
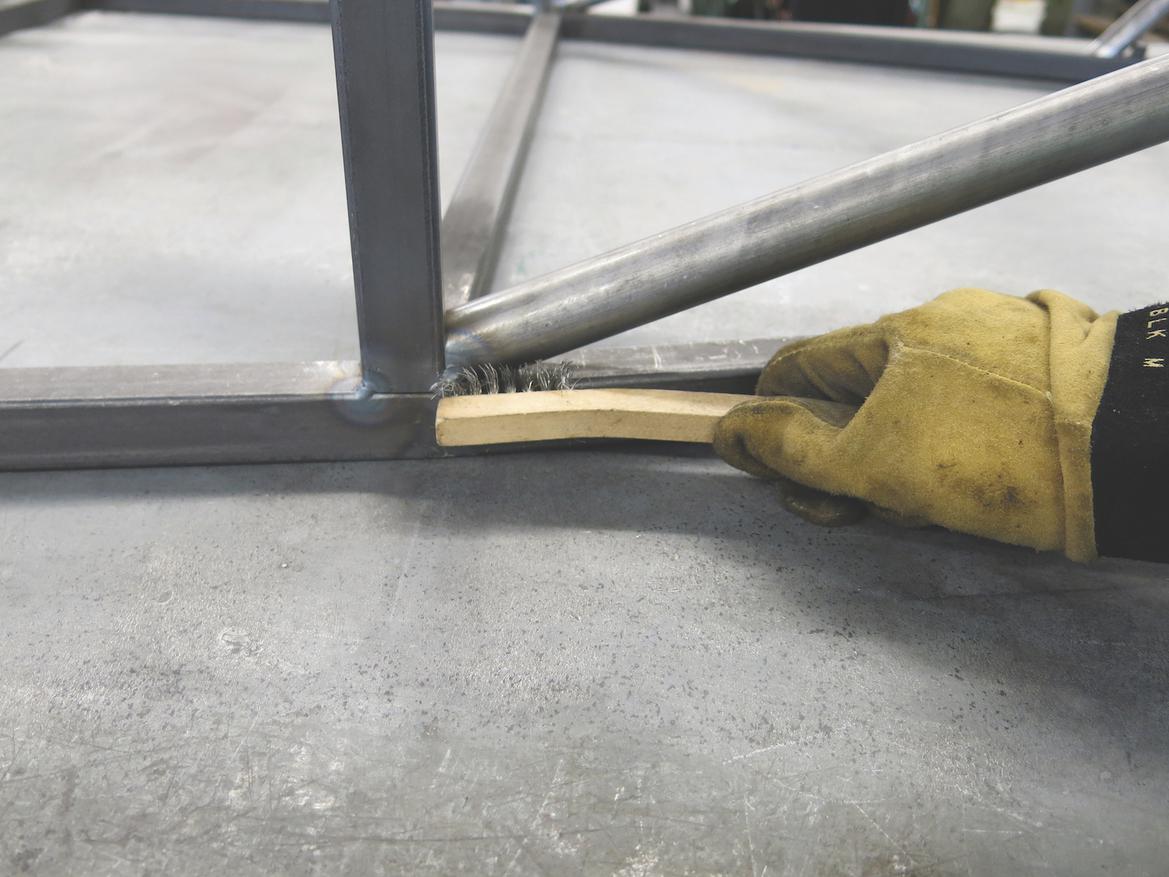
7. Immediately after making your tack welds, clean them with a wire brush. Not only does this leave them ready for the finish welding, but it gives you a moment to inspect them for flaws.
8. Two of these tacks are nice; one isn’t. Guess where we didn’t clean well enough.
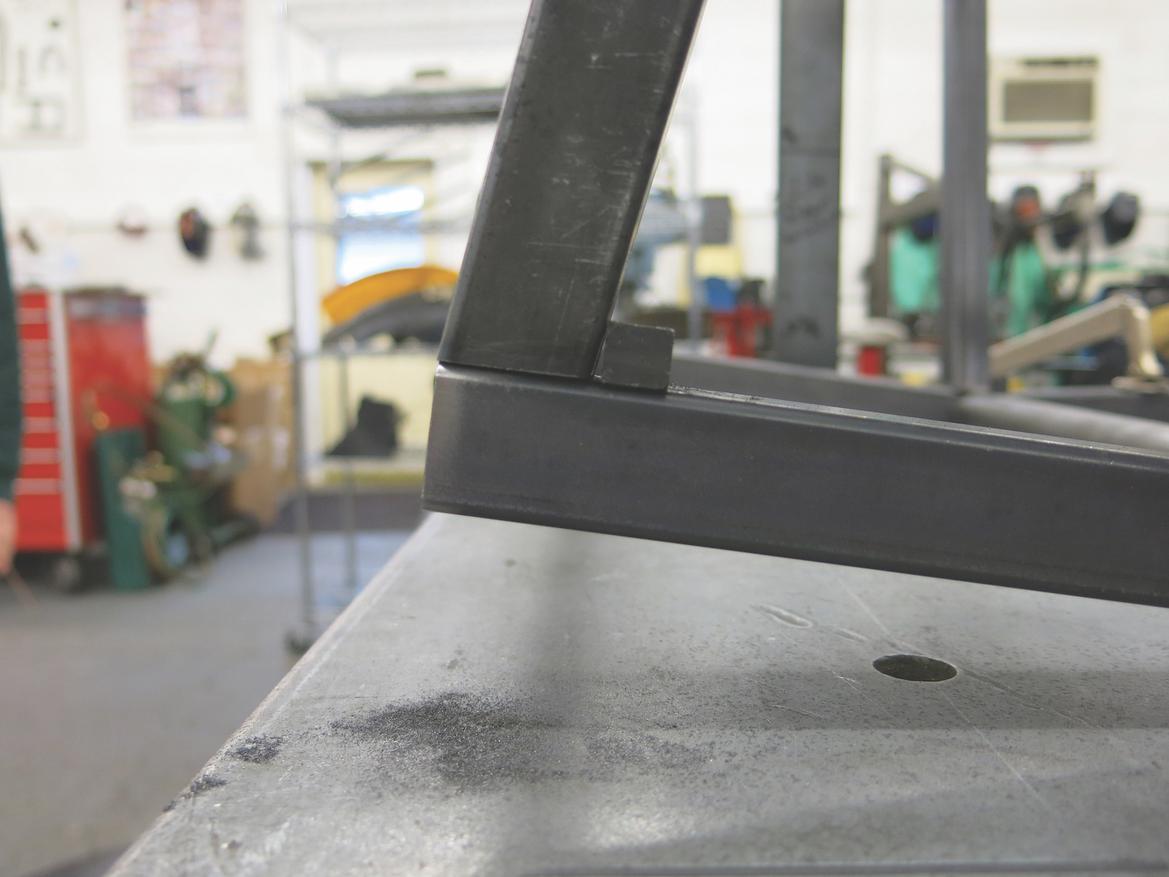
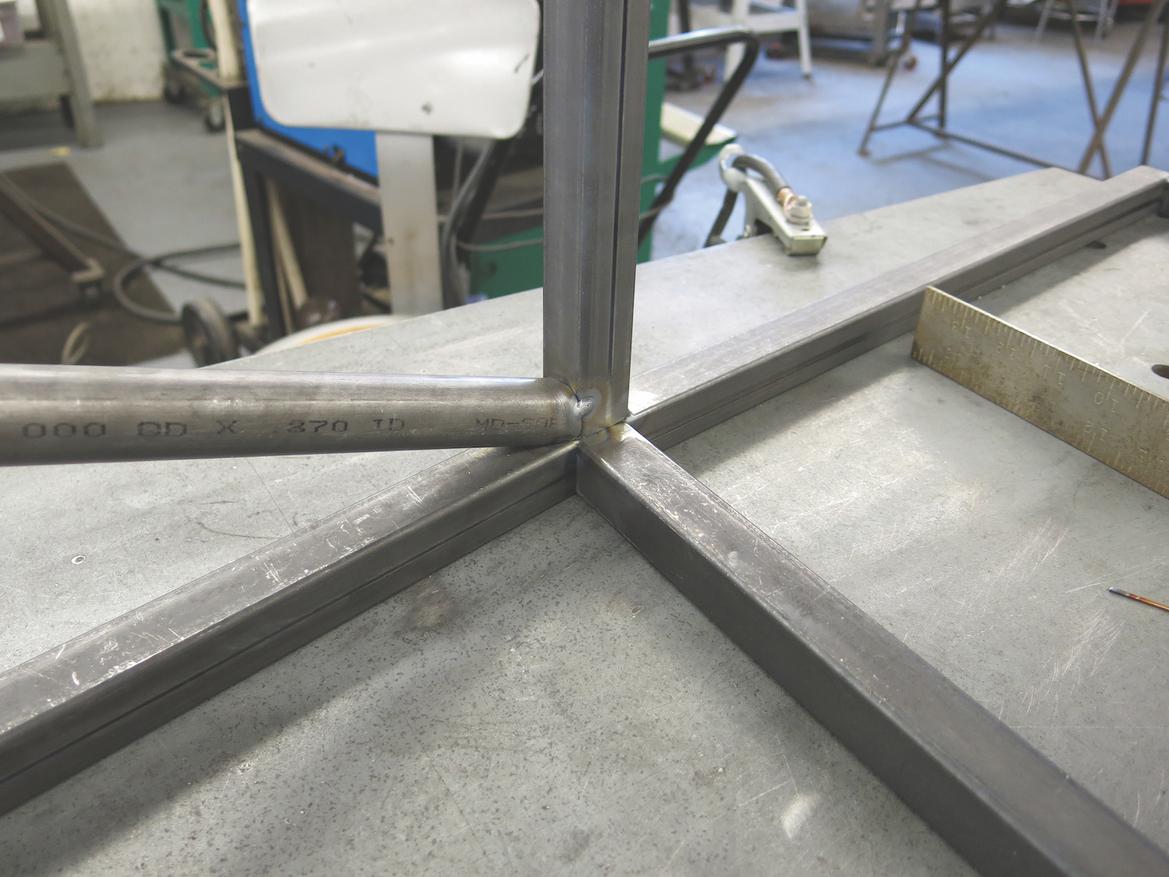
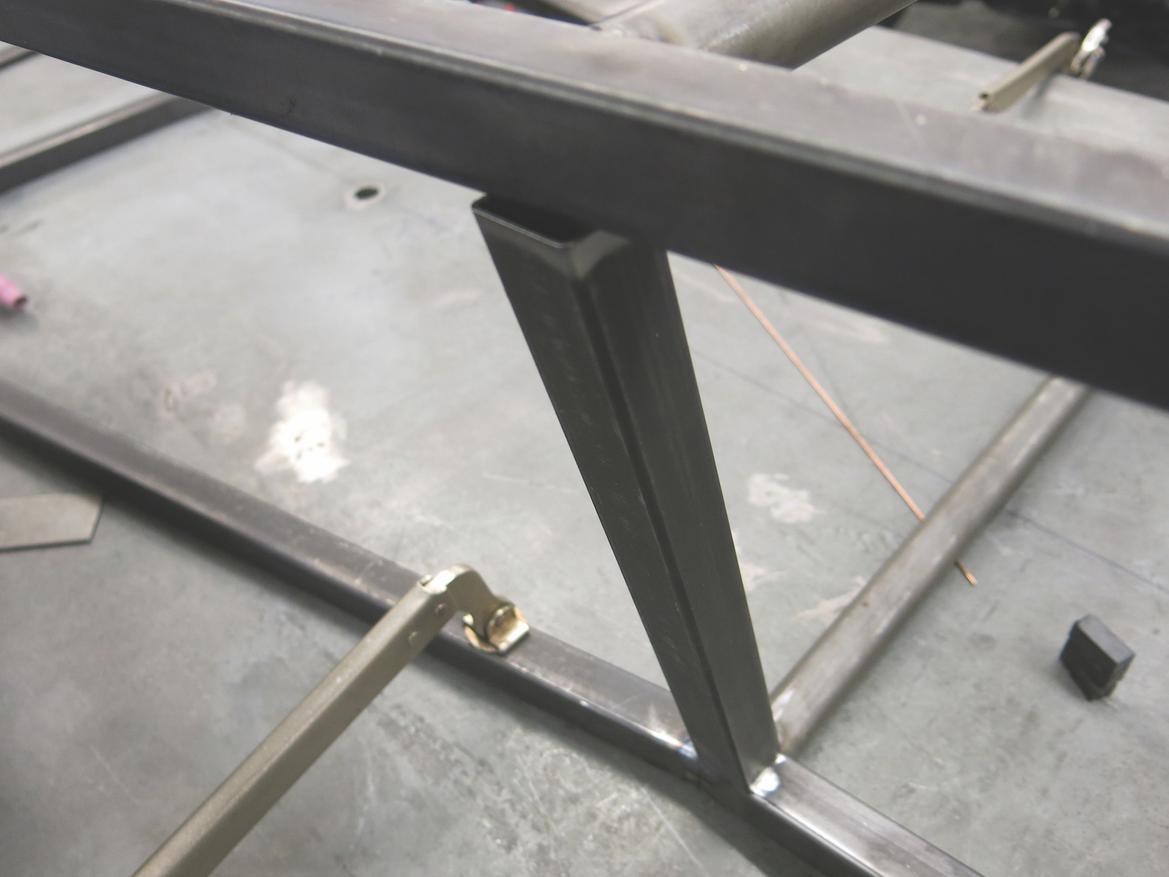
9. We sometimes prefer a looser fixture than a clamp to hold a part prior to welding. This way, we can monitor the effect of the weld and compensate for it rather than leave stresses in the joints that could shift the dimensions later on. Small magnets are great for this purpose.
One caveat, though: A magnet will affect a weld arc, so always keep your welding at least an inch away. Note the perfect fit before and after we welded this piece; we kept our overall dimensions by putting complementary, similarly sized tack welds on diagonal corners.
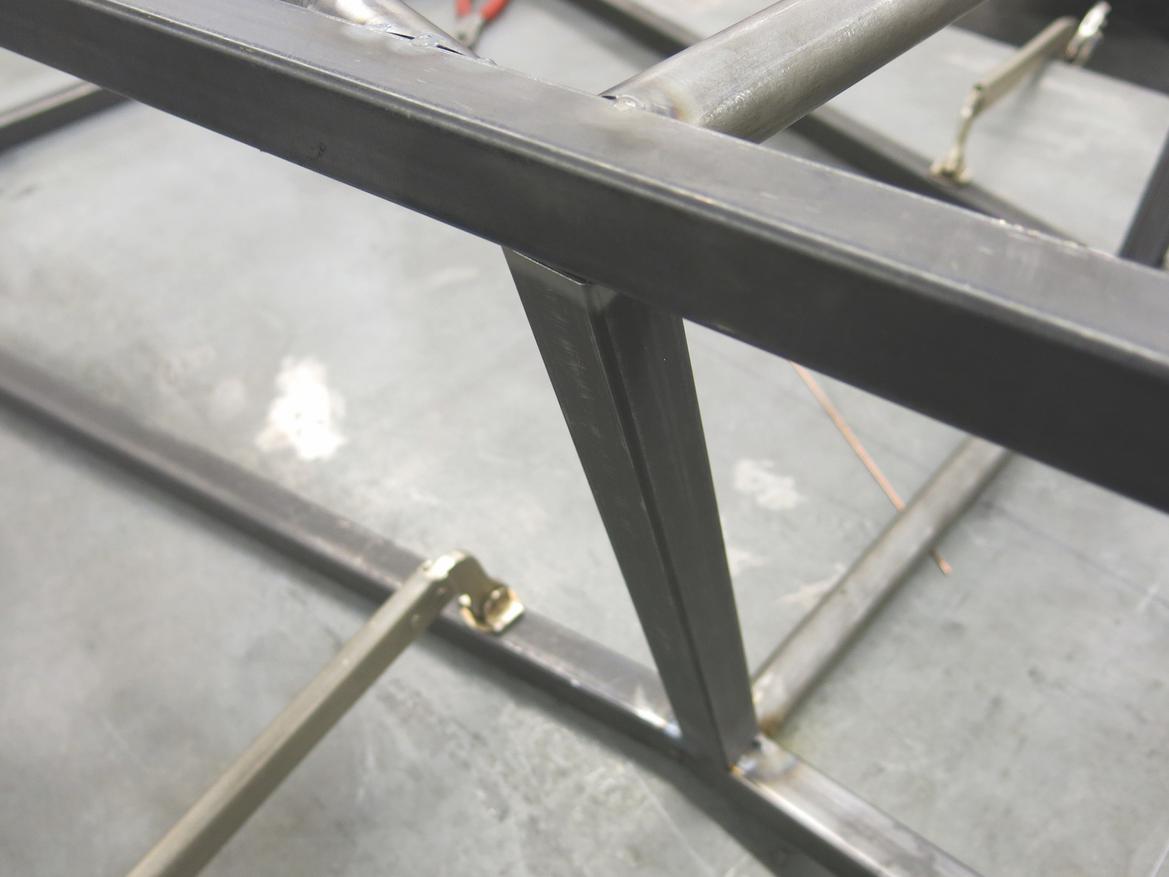
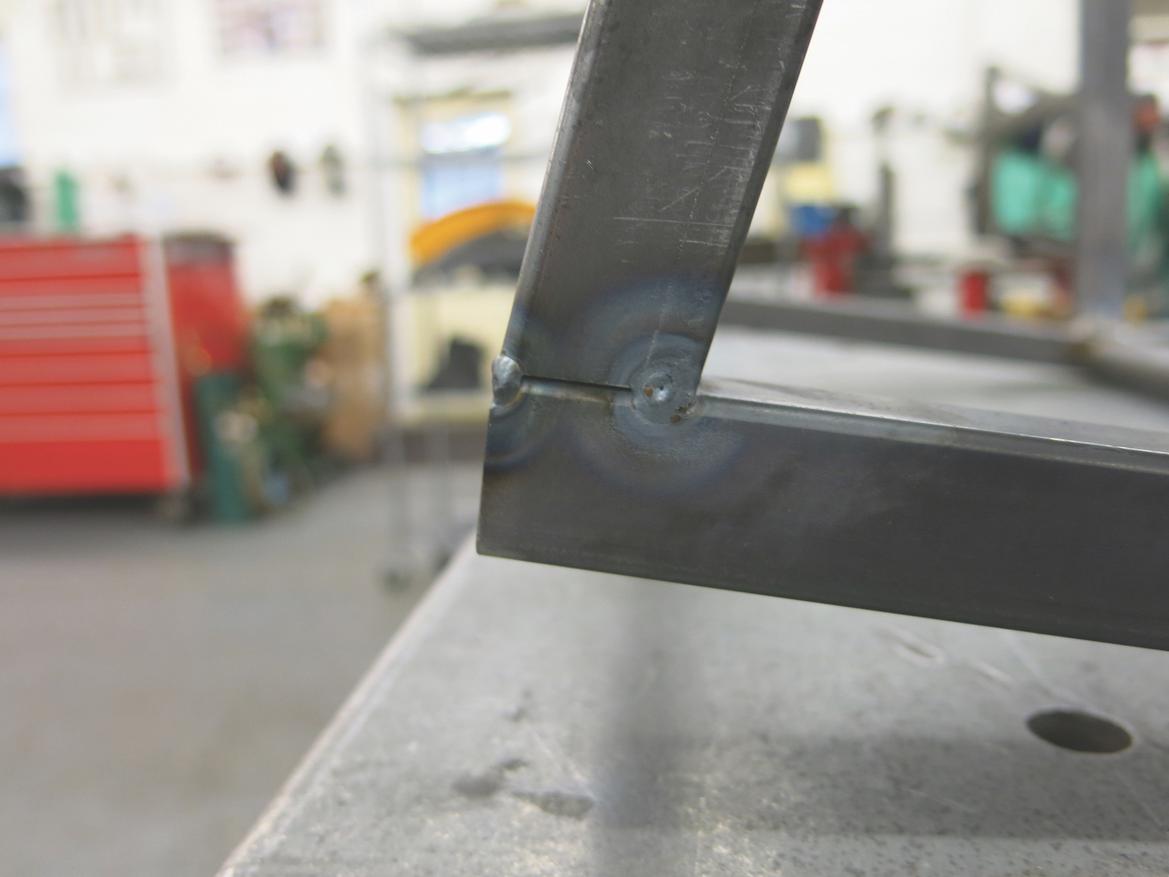
10. One tack weld at the base of a 11.25-inch-long tube moved it close to 3/16 inch at the other end. We placed a tack at the corner diagonal to the first tack and pulled it nearly back into position. Another weld on the inside by tack No. 2, and the tube was right where it needed to be again.
Locked in with the first three tacks, the part didn’t move for the last one.
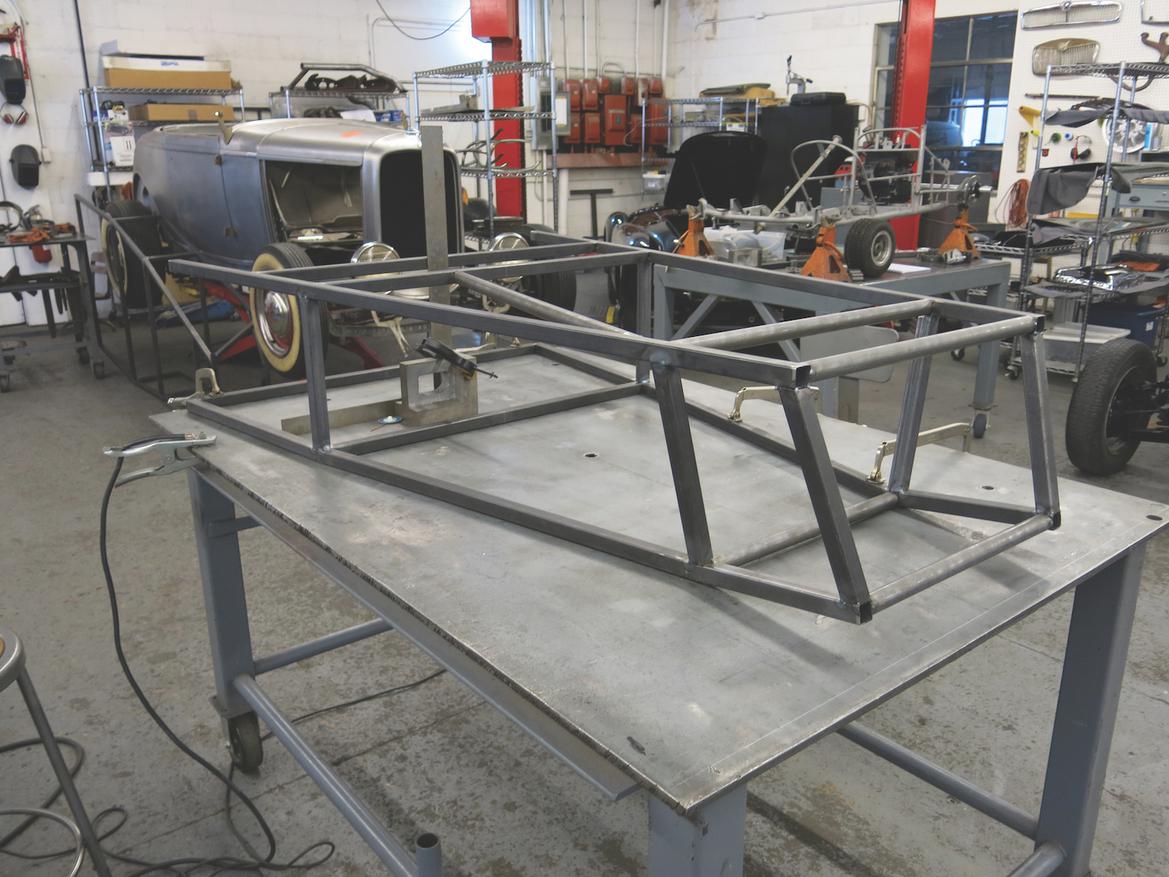
11. Our chassis is now about 50-percent finished. We’ve been able to maintain its dimensional accuracy to 1/32 inch on the diagonals without a complex fixture, and that’s thanks to using the proper methods: carefully fitting the parts, maintaining cleanliness, and planning our weld sizes and order to keep dimensions in check and stresses out.
We’ll continue using tack welds for the rest of the chassis until it’s fully assembled. After that, we’ll start finish-welding each area, again skipping around to complementary and compensating joints to keep dimensions accurate.
#Weld #easy #steps


More Stories
Layne Riggs Honors Father in Infinity Communications Darlington Throwback Scheme – Speedway Digest – Home for NASCAR News
Anticipation grows for SF-24 aero package: Ferrari to “test” updates before Emilia Romagna GP (video)
Mercedes Outclassed By Customer Team Yet Again